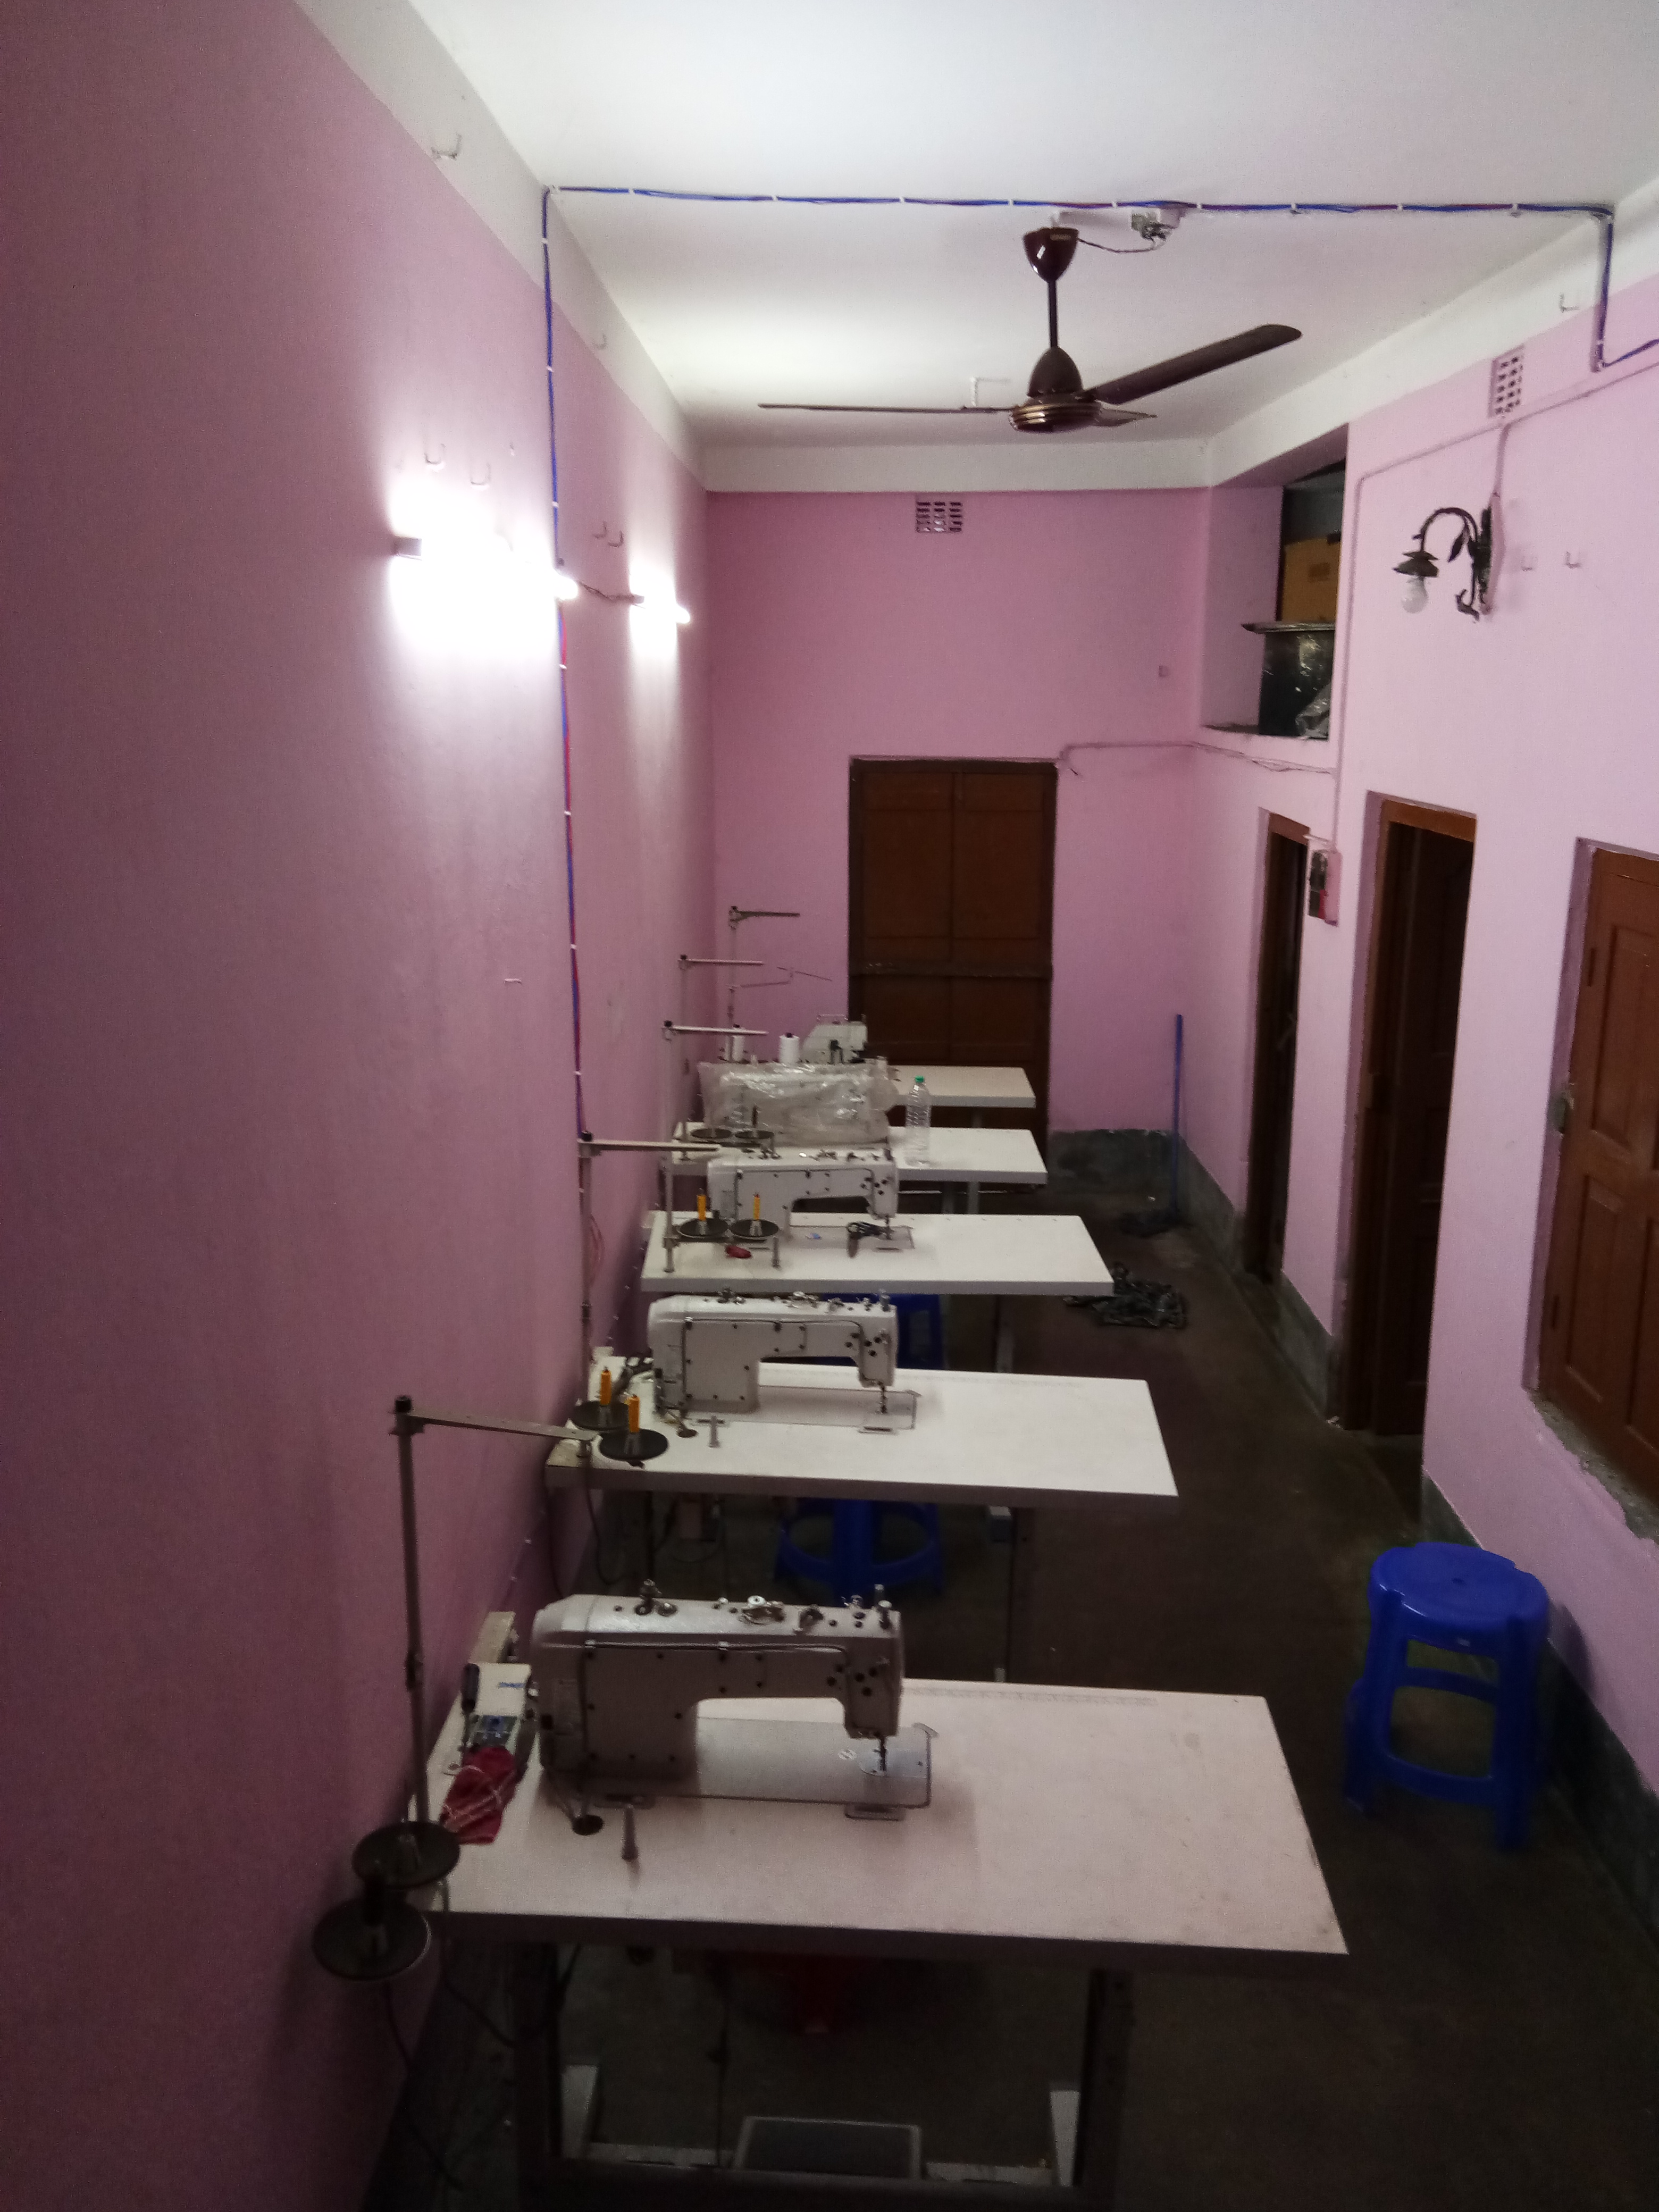
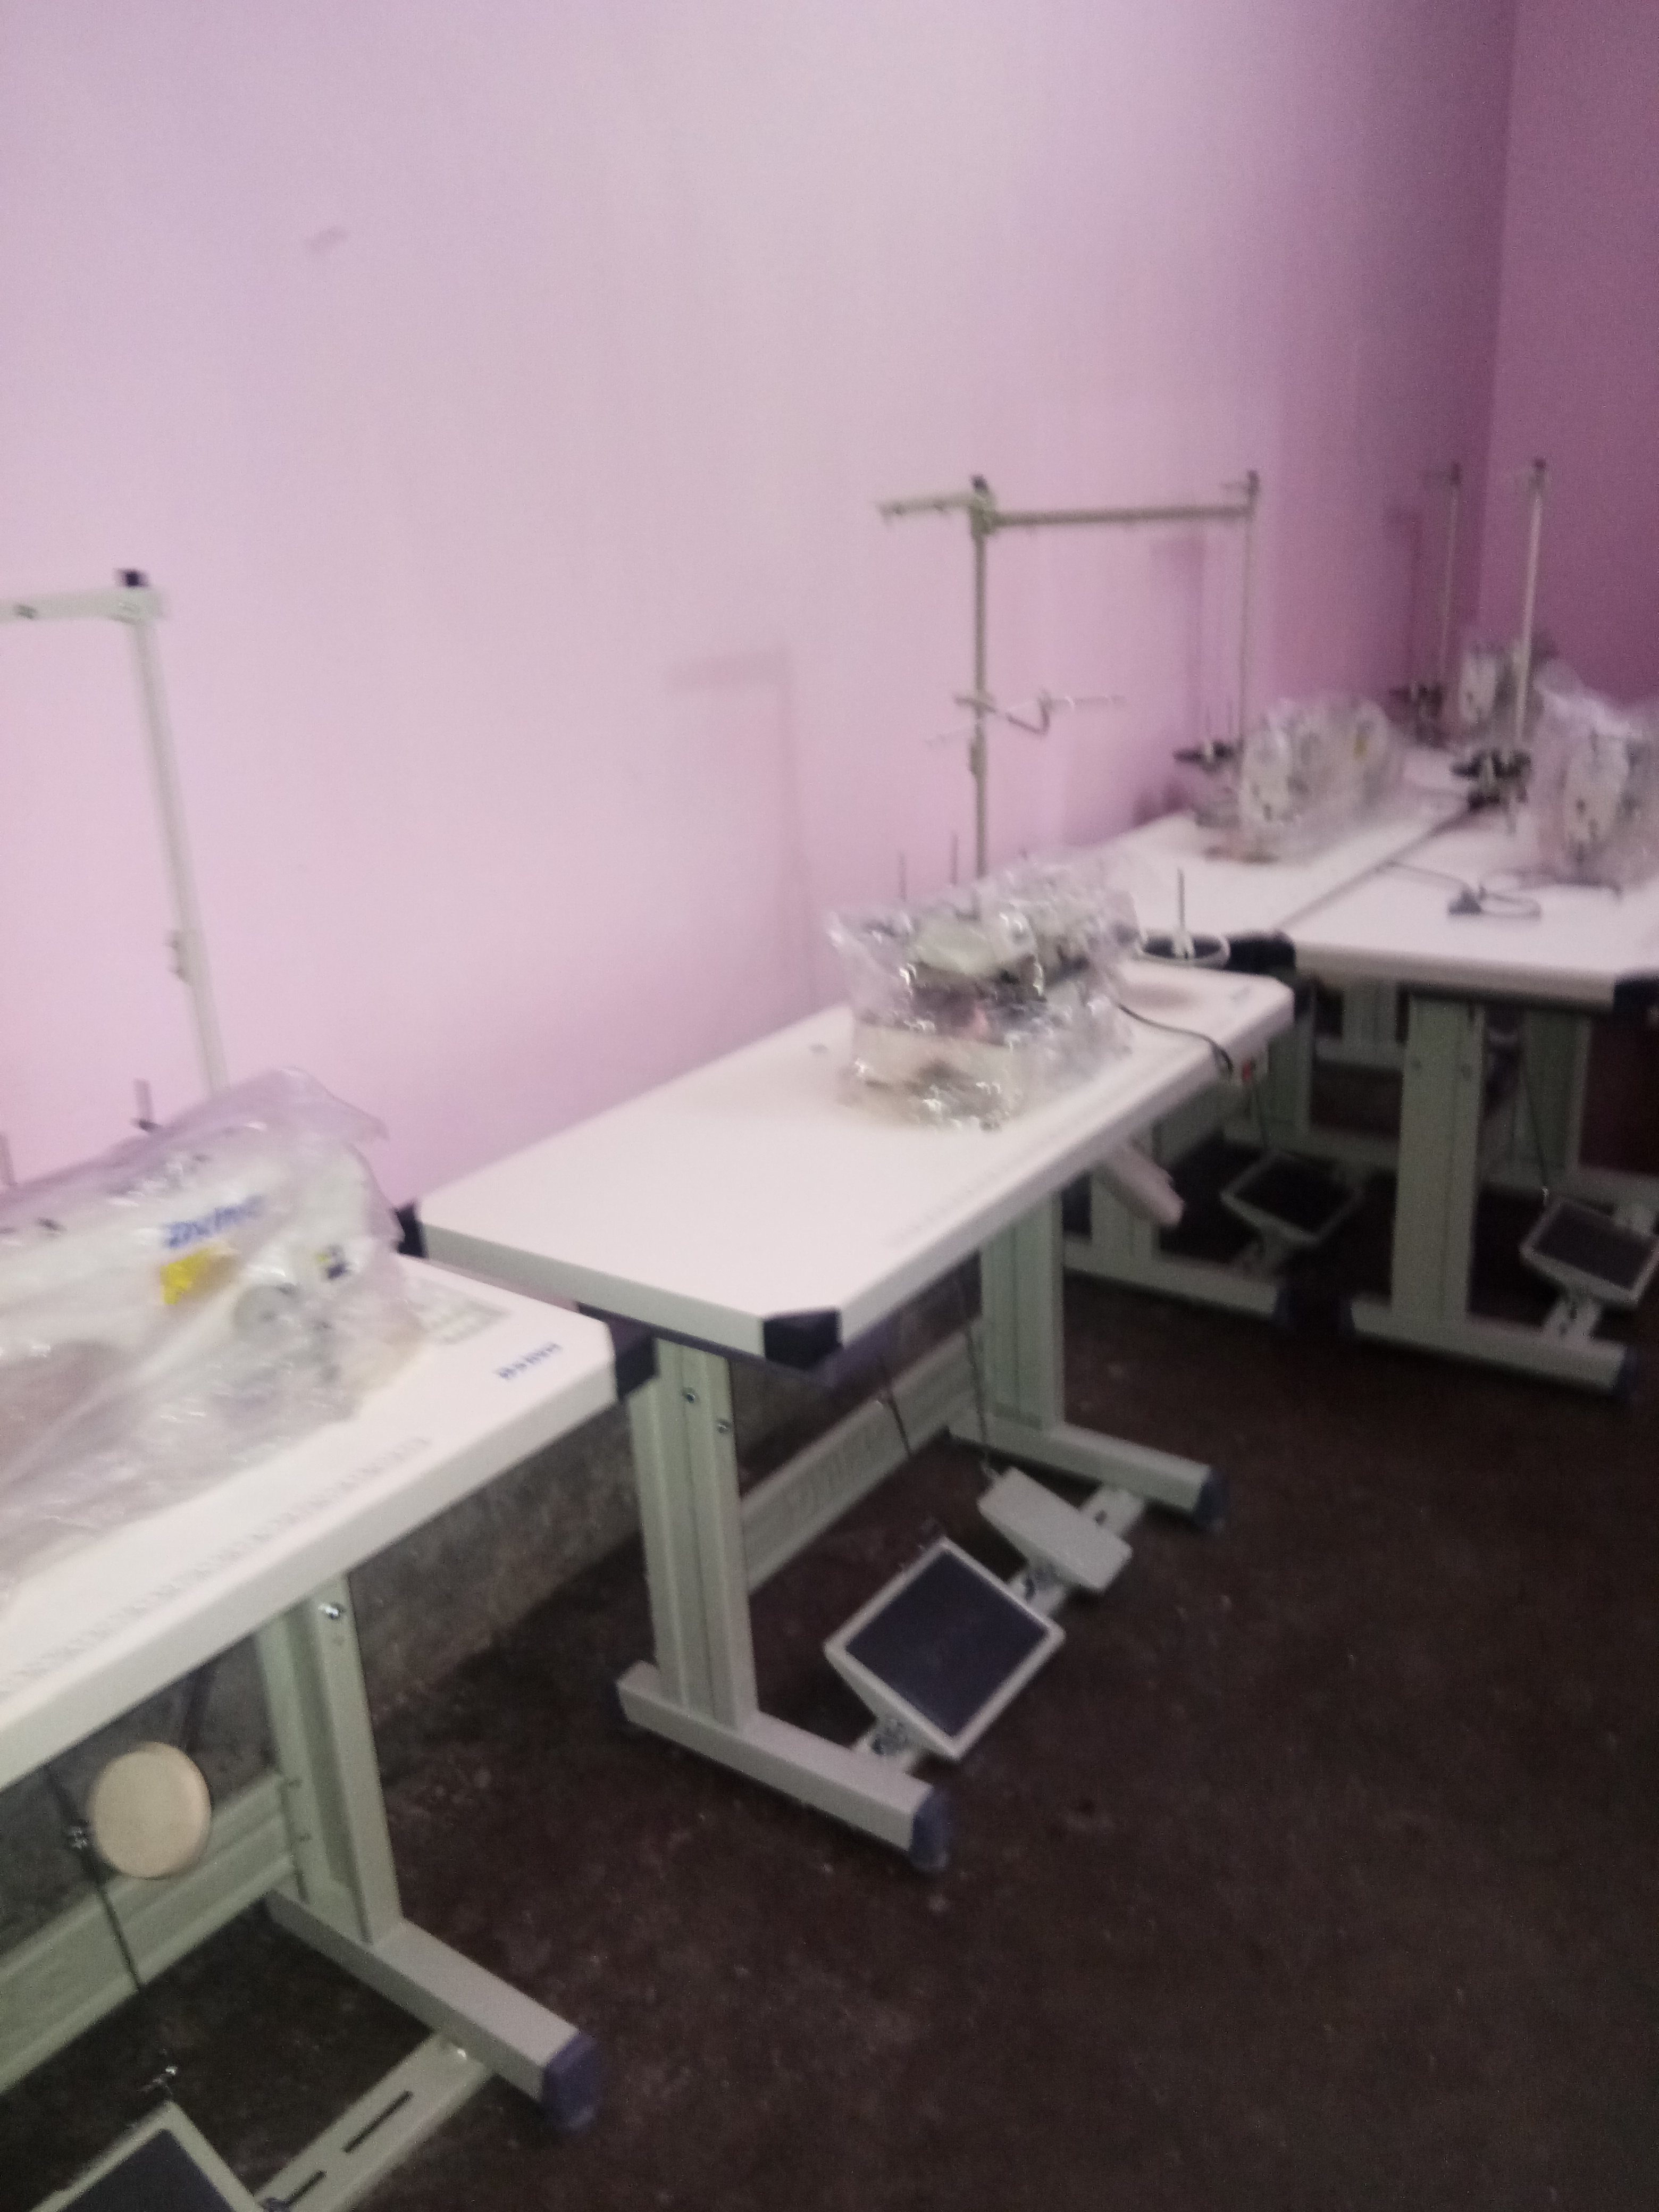
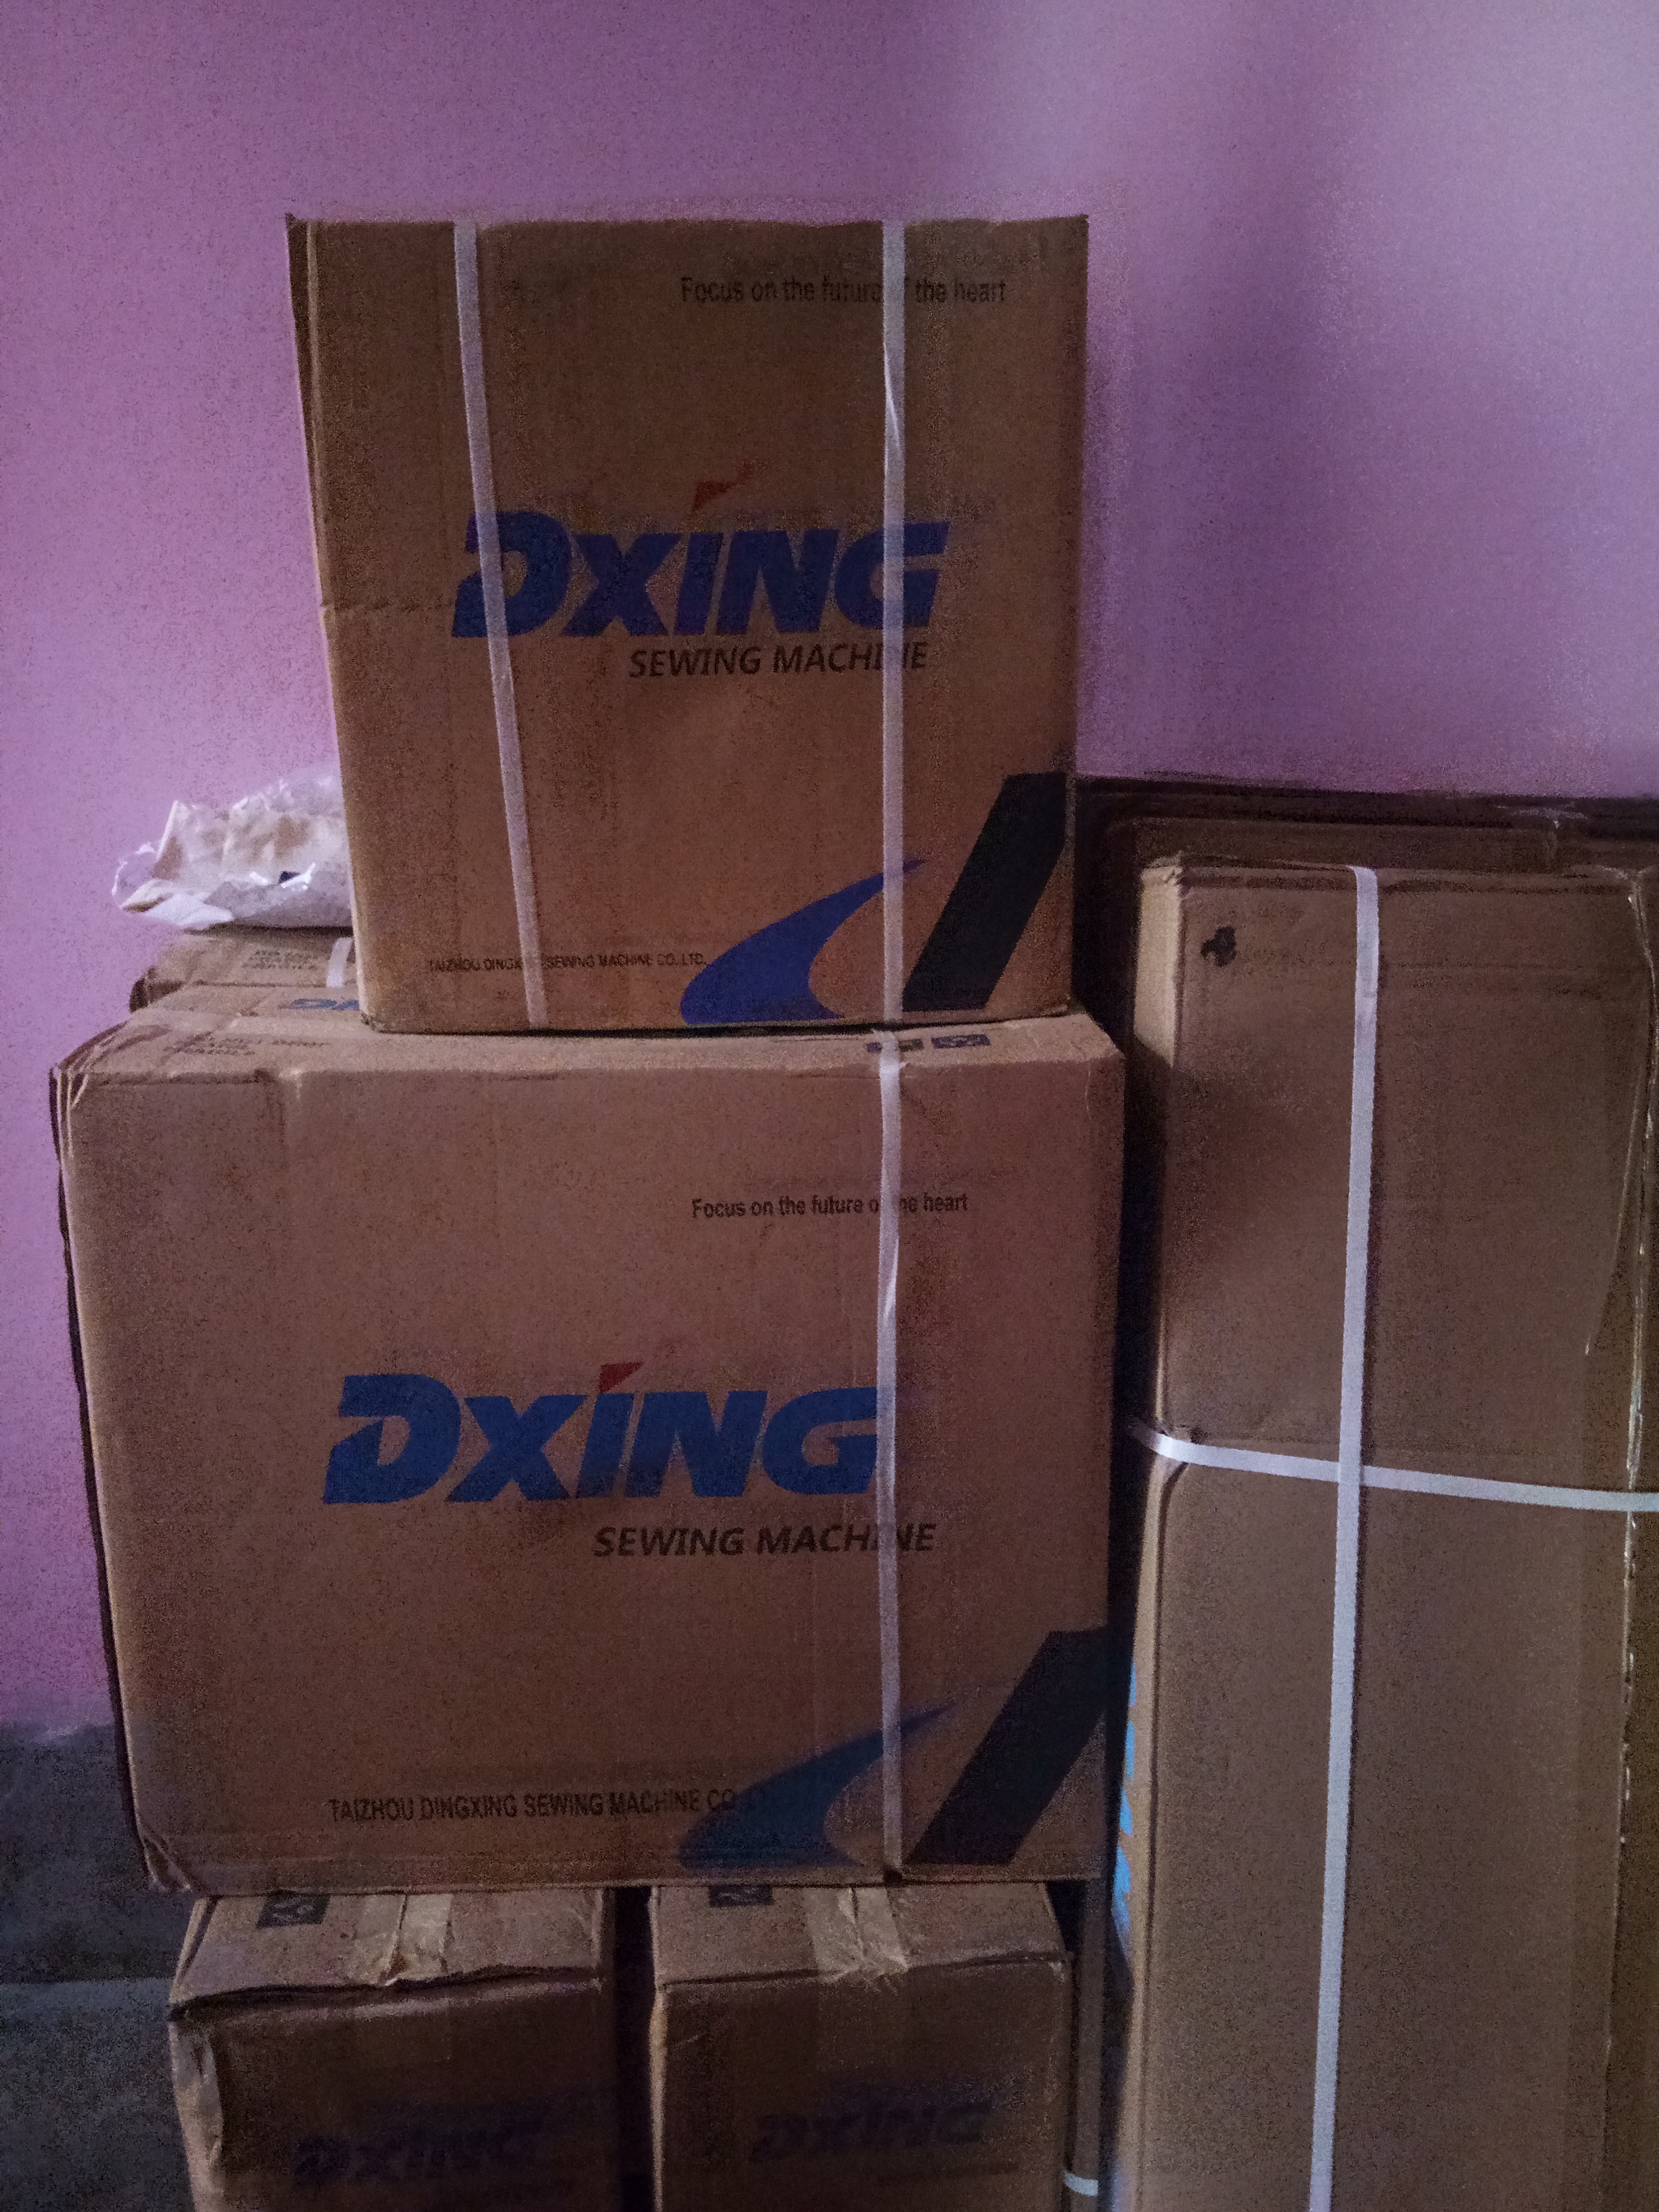
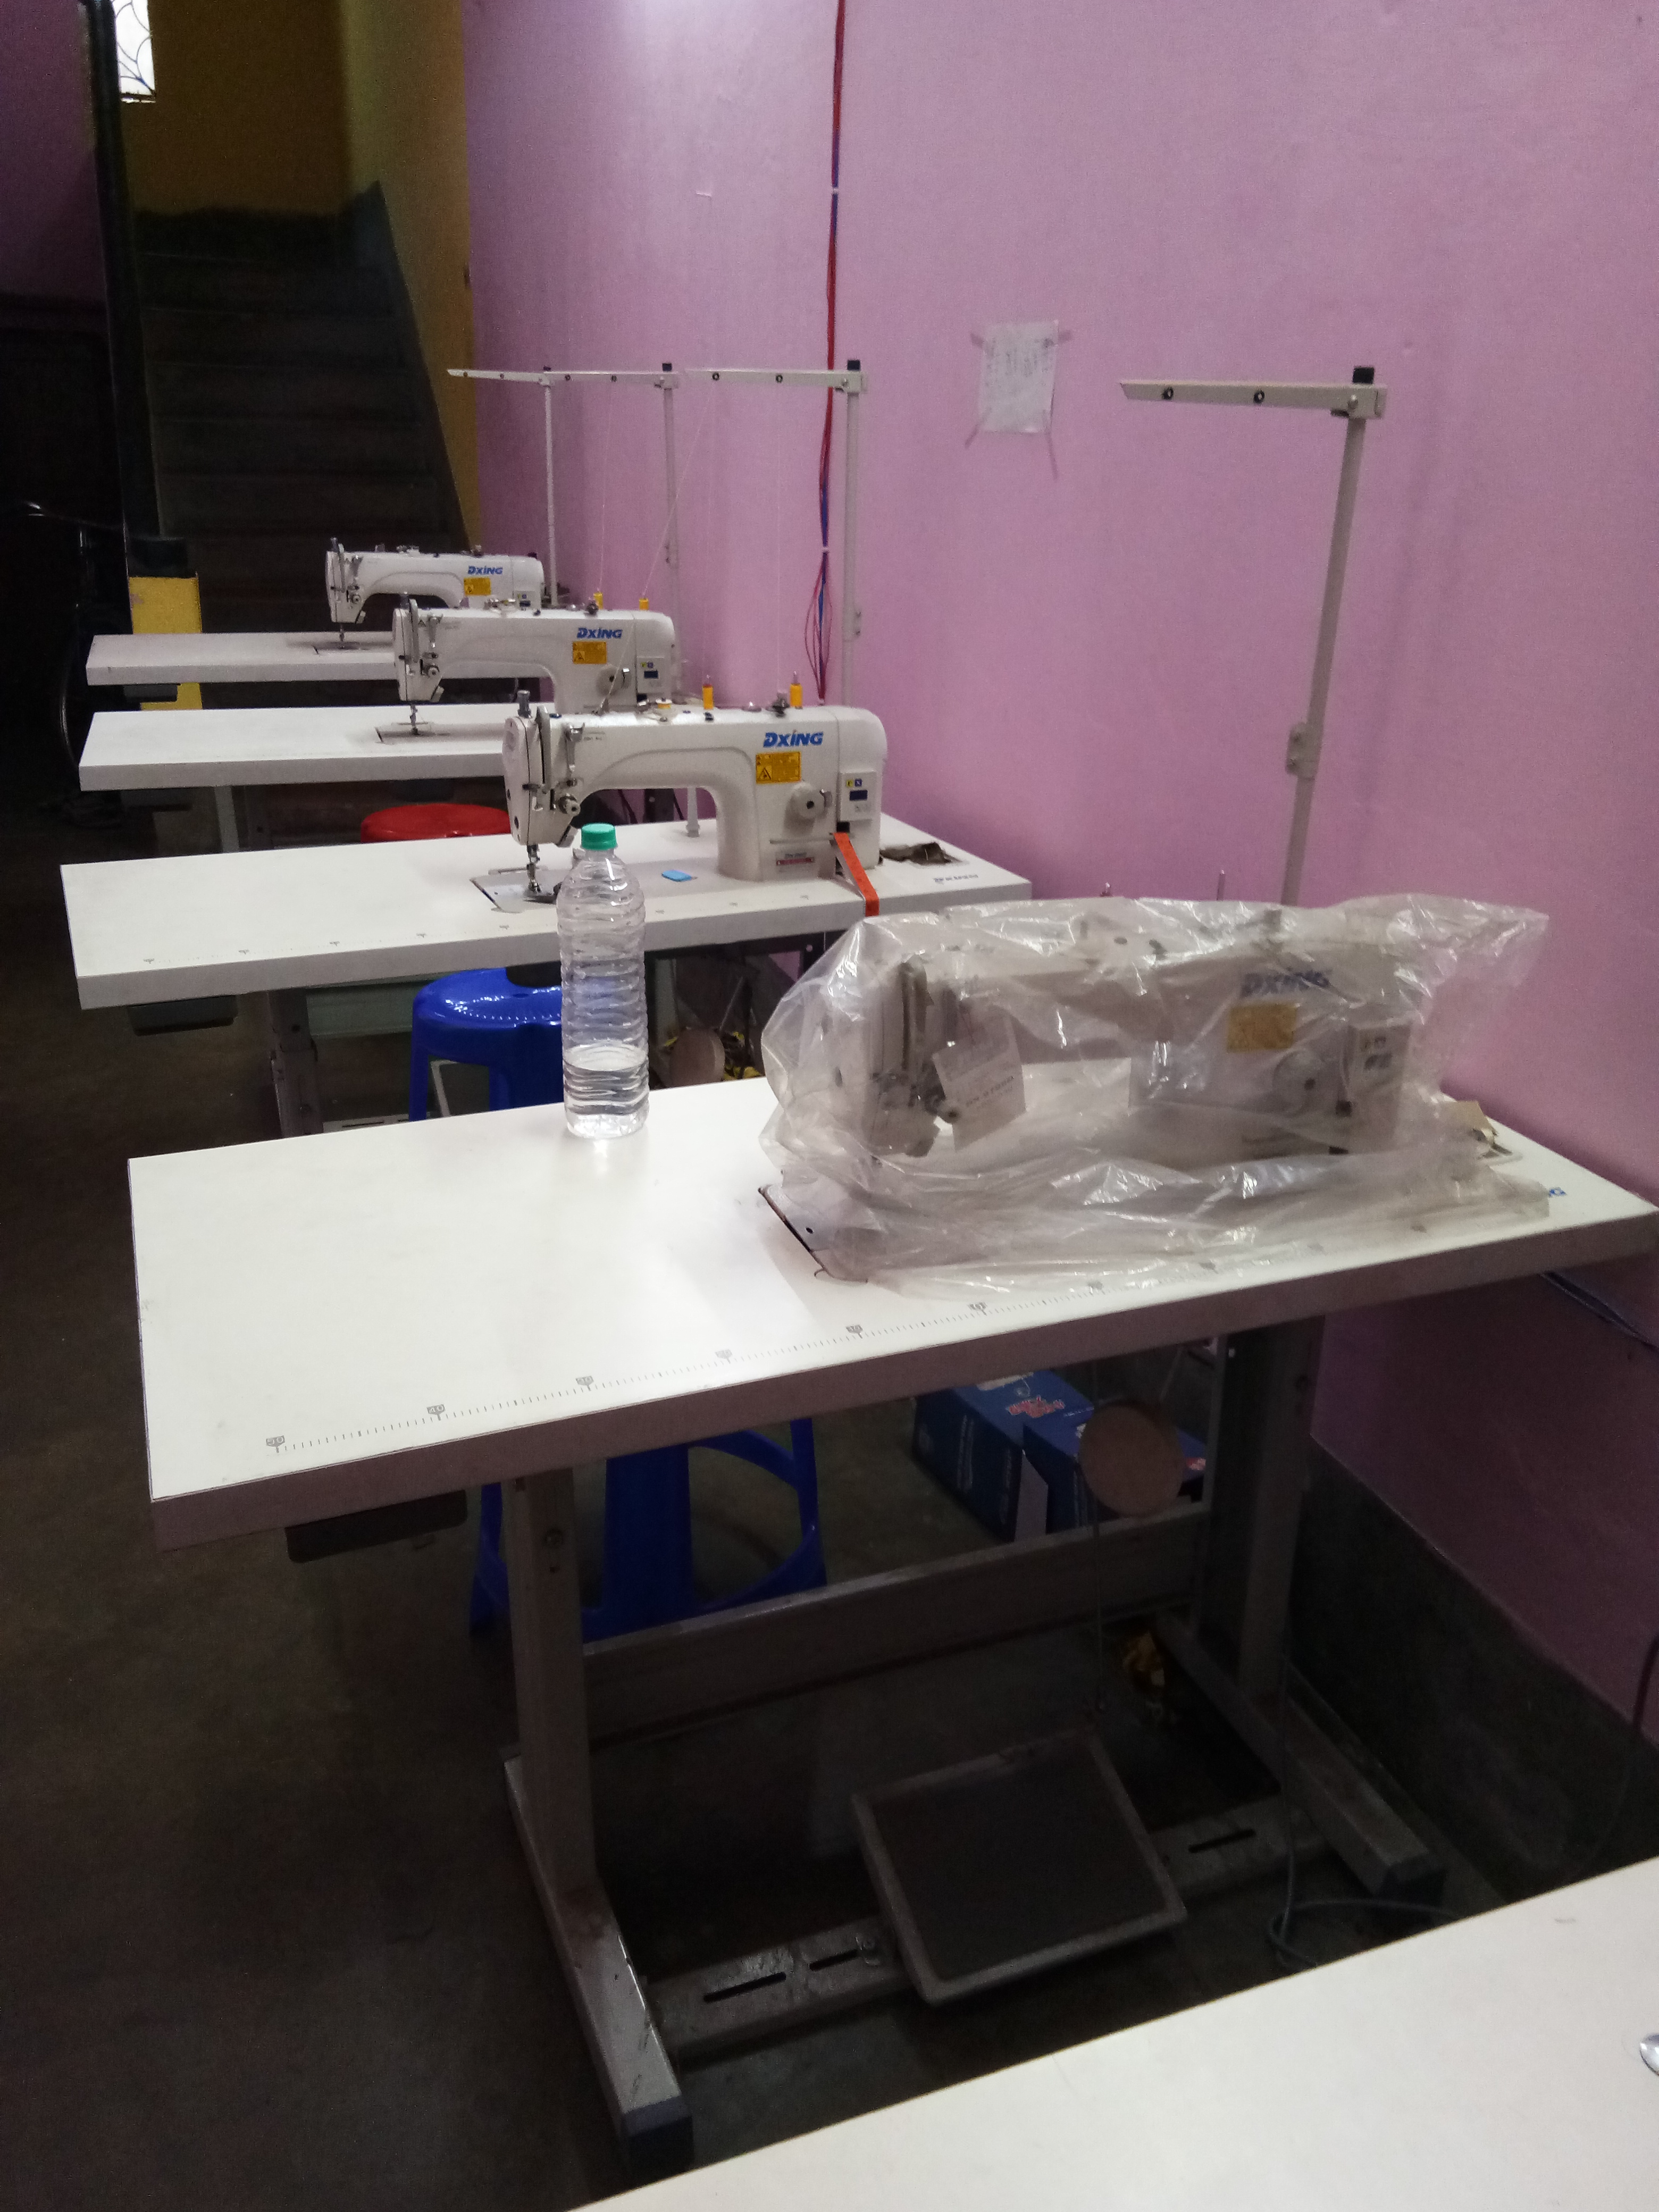
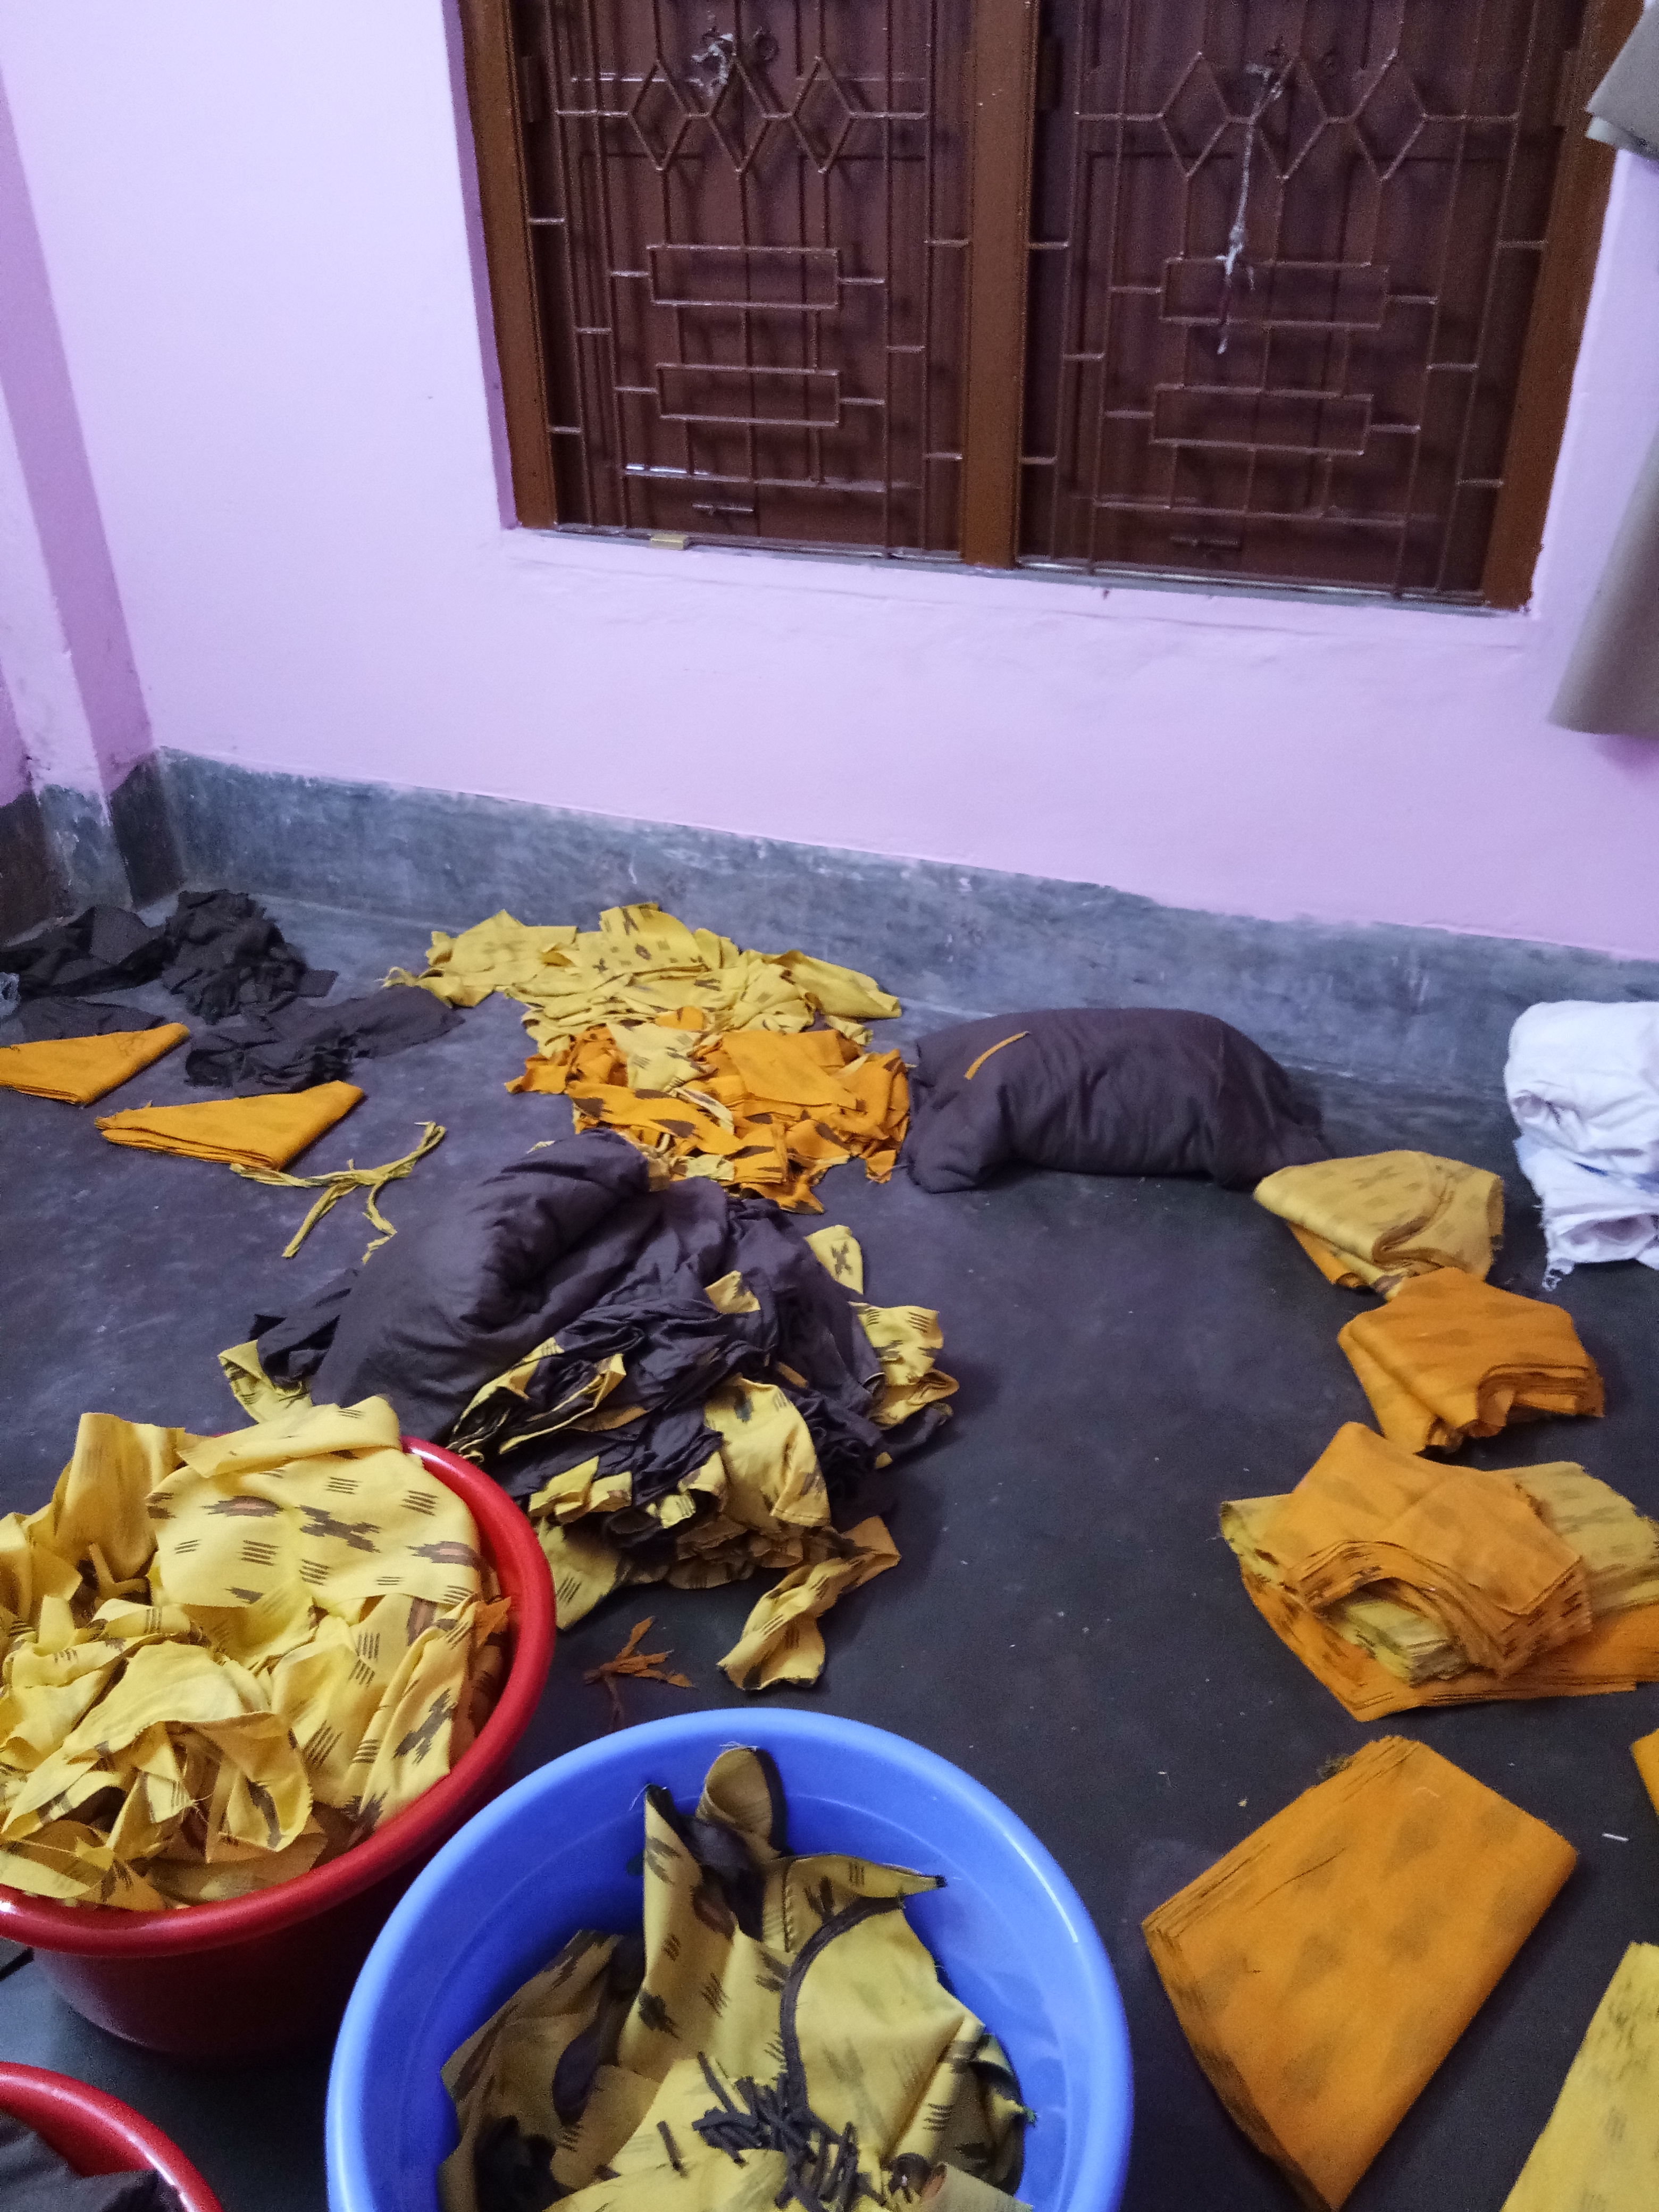
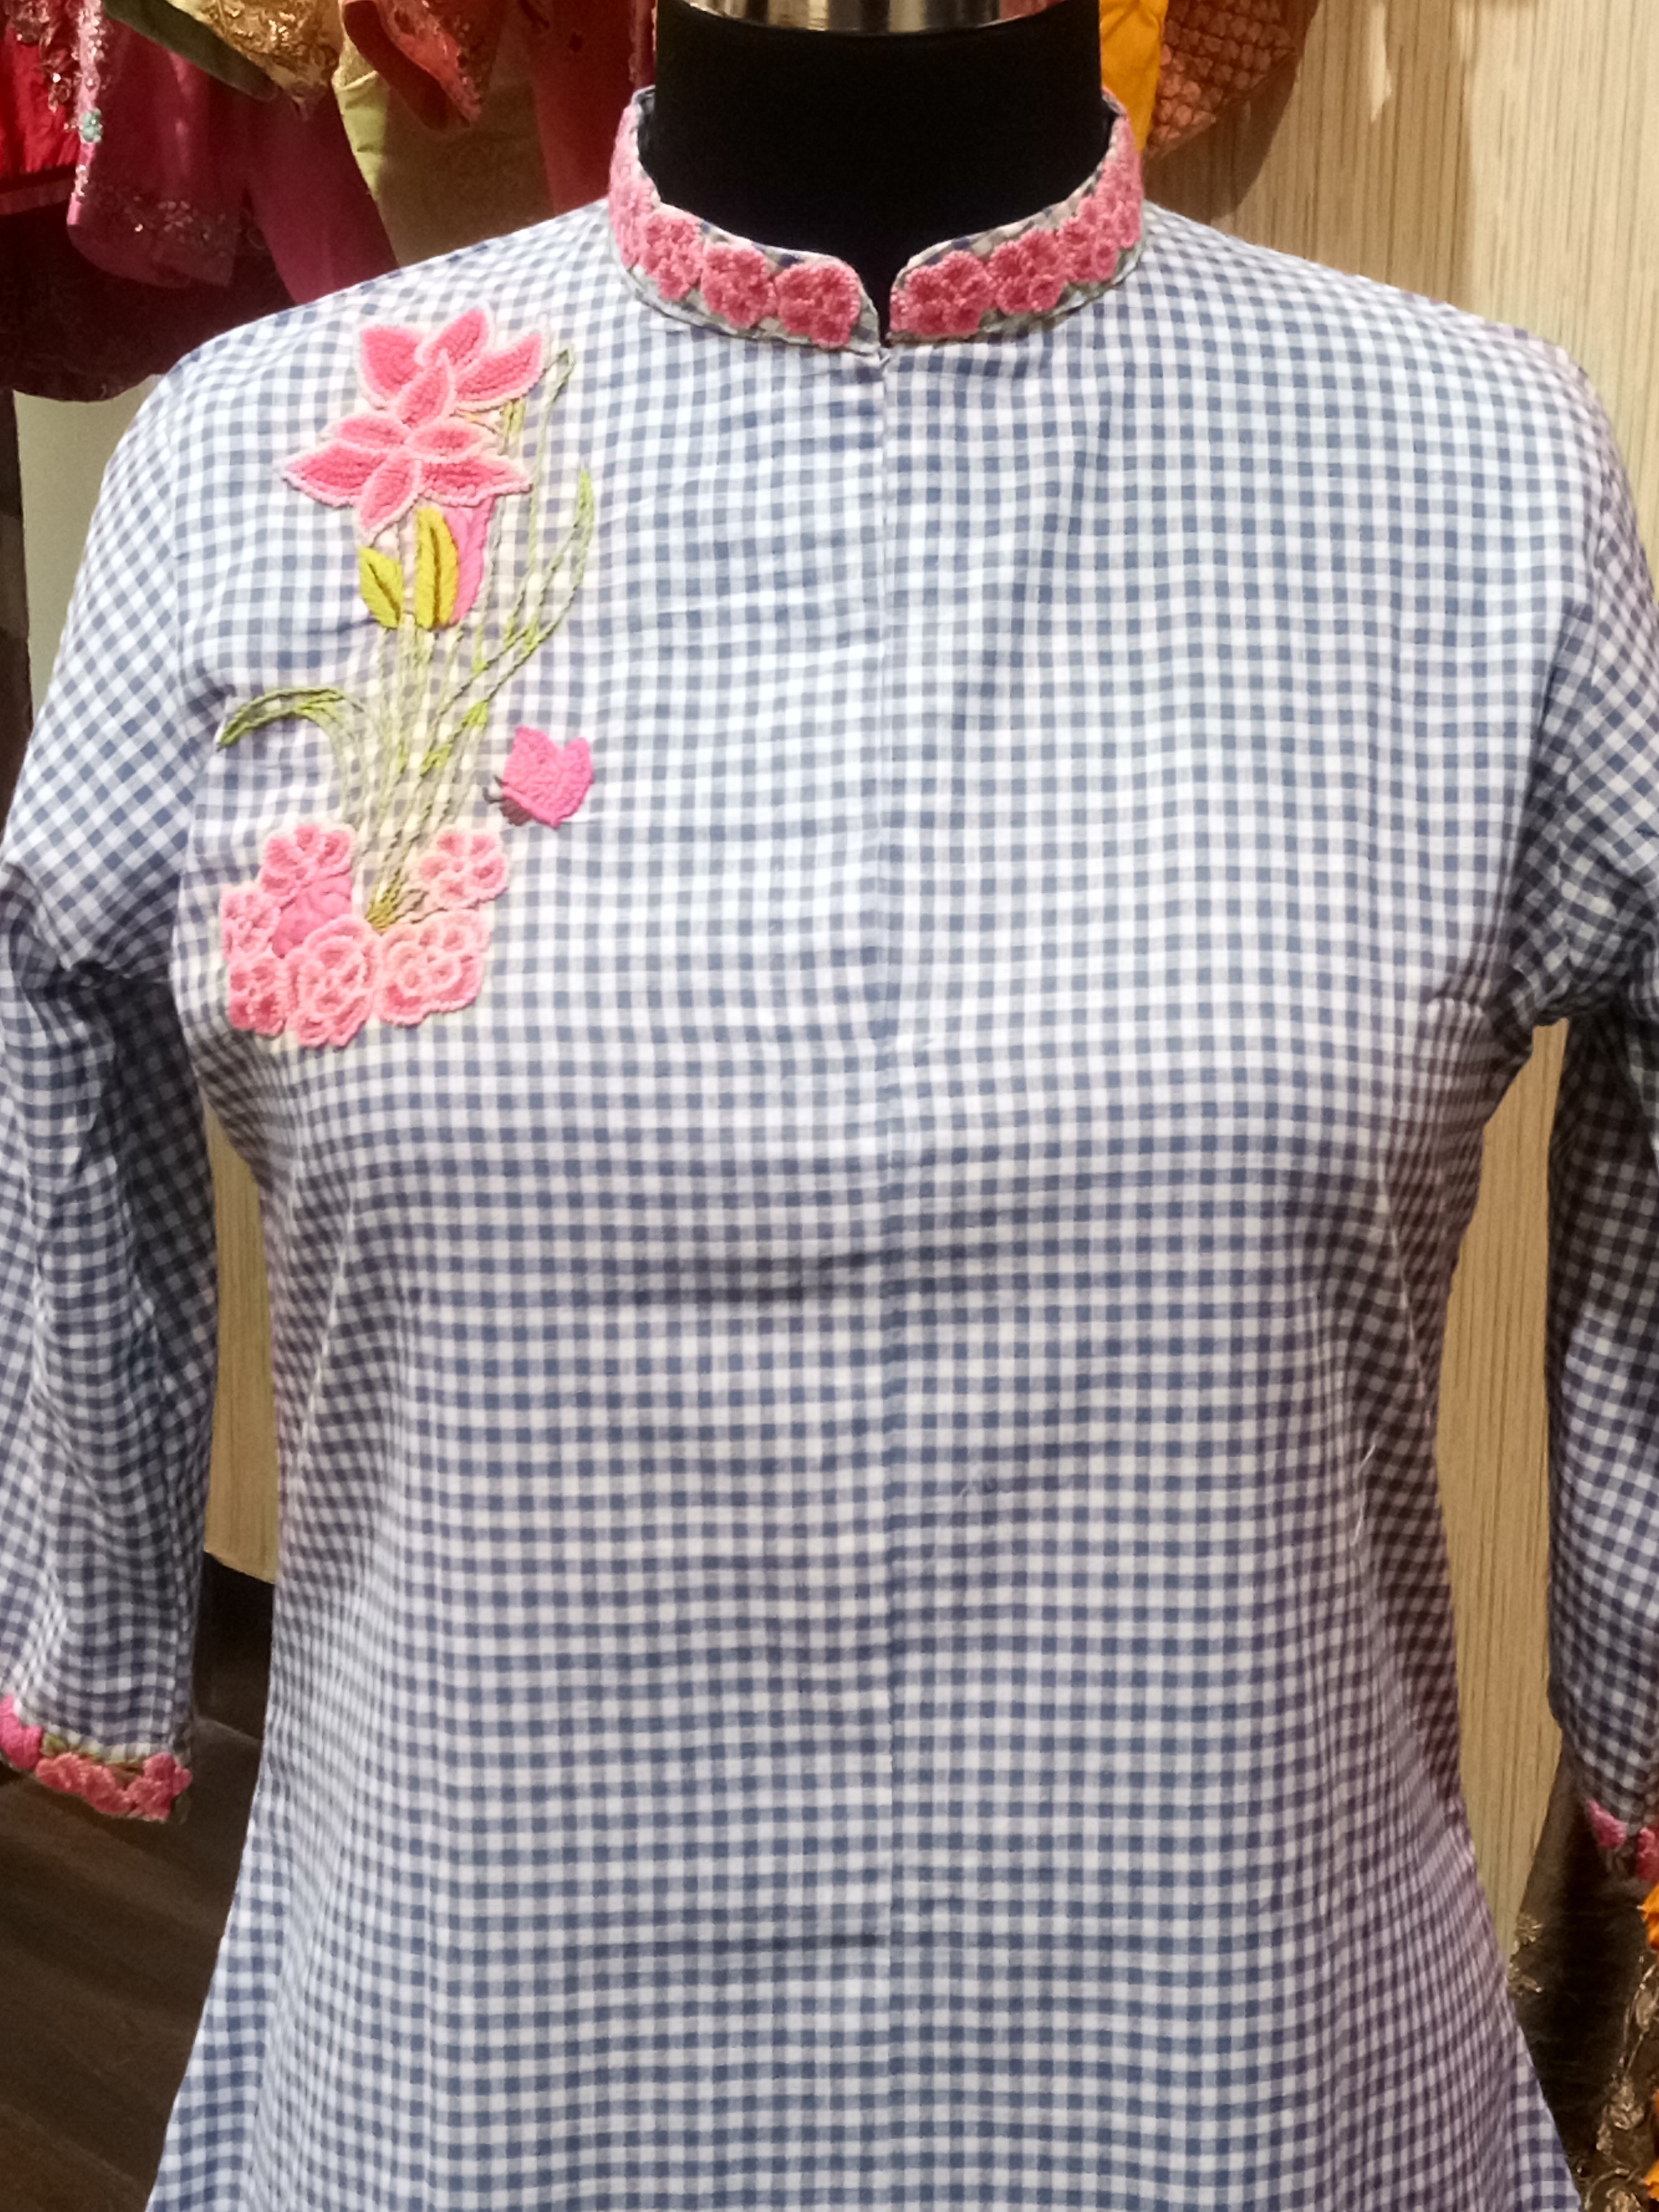
Readymade Manufacturing Garments,Ladies shirt ,T-shirt, salwar kamiz, suit,kutti and gens shirt ,t shirt, pants suits coat
Fundraising campaign by
kamalesh bala


-
US$0.00raised of $110,000.00 goal goal
The campaign owner has stopped the page from accepting further donations. Please contact them if you'd still like to donate
After years of fantastic life experiences all over the world,
I am now ready for a new big change, a DREAM COME TRUE!
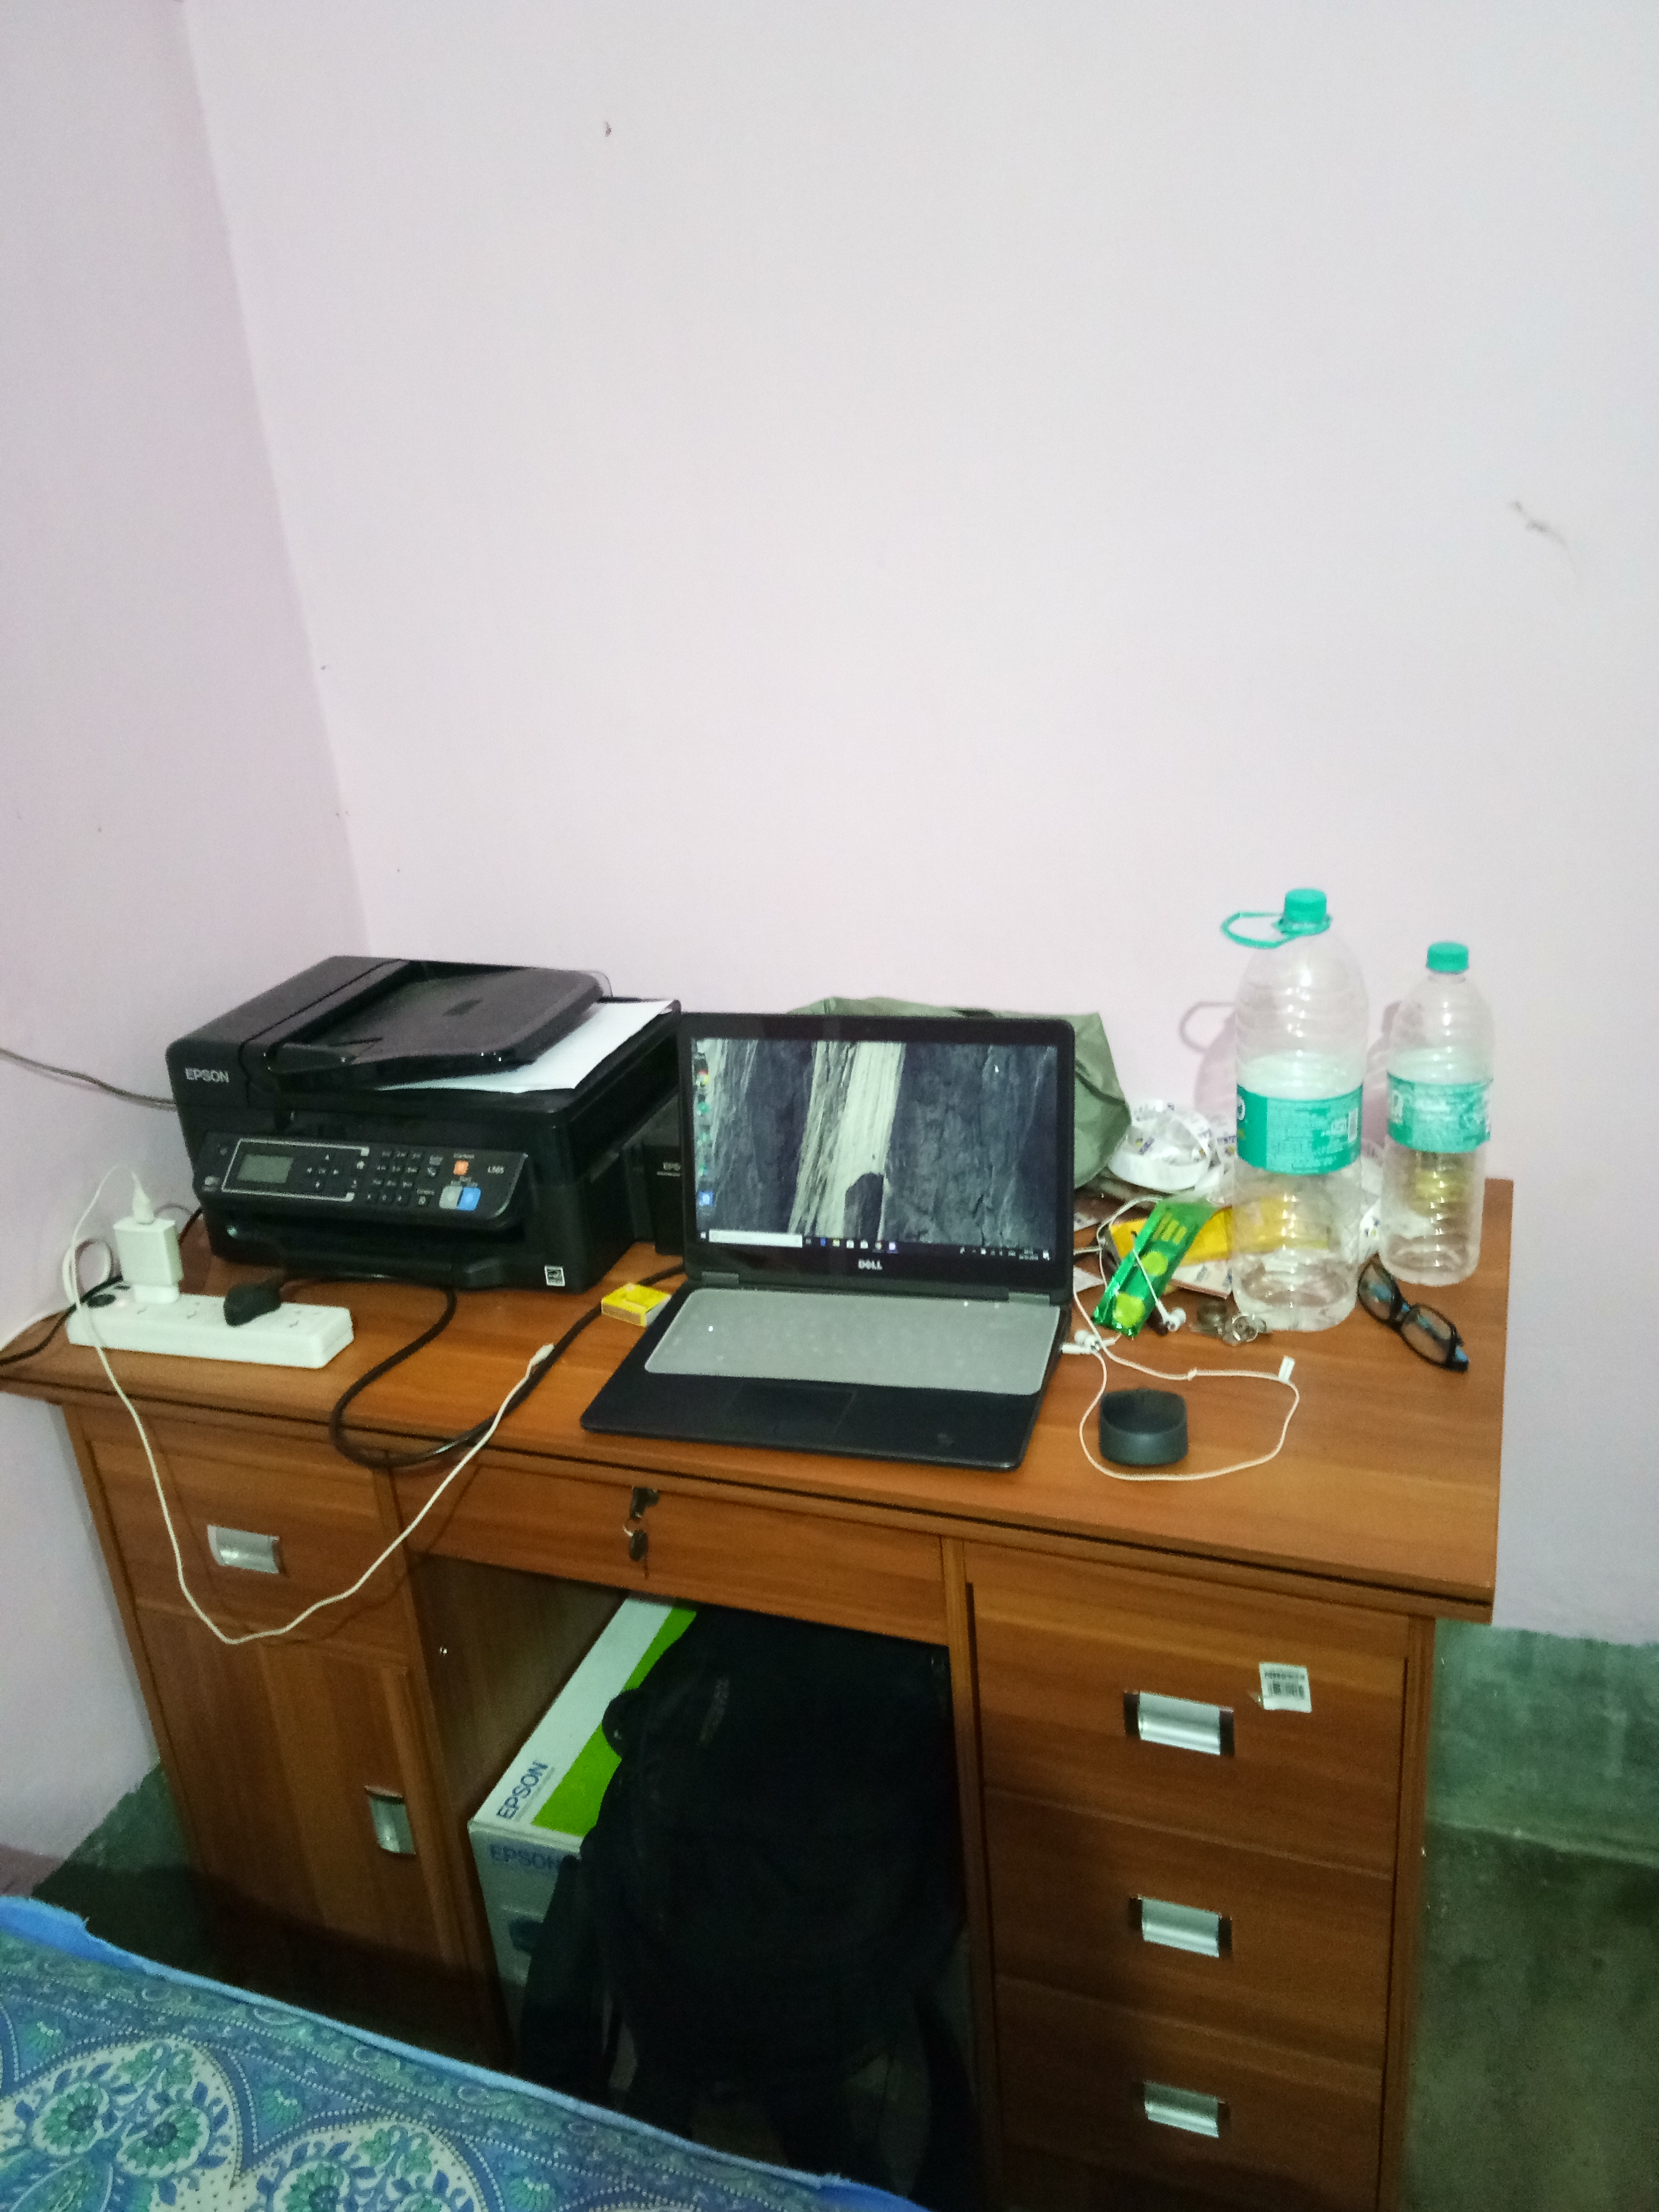
I want to live with a truthful person and fight with the truth I can do everything like ordinary people but because of my situation is very bad that I am now a bakery, in that case I am now seeking a fund to all and my job is to take this task a long way. If you are blessed with your blessings and if you are interested, then I will be grateful to you and I will do this. I will be able to take my place in the world and you will be with me and I will be able to create many things for you, as if I did not have a ready menu for 5 years of experience and five years ago I took the degree and now I started the job If I want to do so many funding I have posted a funding and I give some tags and this to you and You can see these and follow my Twitter or Facebook to learn something special, and for that I want to do all and present the detail to you. I want to be like you, please share a please.
Garments Pattern | Pattern Making | To Make a Pattern for Trouser
Experiment name: To make a pattern for trouser.
Objectives:
- To know how to make a pattern for trouser.
- To know about its importance.
Introduction:
A pattern is the actual copy of different parts of a garment that is made by cutting board paper after sketching on it. According to this pattern cloth is cut and then garment is made. For industrial production different patterns are made for different size and a marker is made with these different patterns for a large-scale production. Then many cloths are cut at a time and finally garments are made by large number of workers in garments industry.

|
| Pattern making |
Functions:
Now making a pattern has some functions. These are as follows:
- To sketch the parts primarily according to the body on paper.
- To make pattern for different size by increasing measurements.
- To make a marker for large-scale production.
- To use these patterns made by standard body measurement for many times.
- Finally to save time and money to make fast and cheaper production.
Measurements for trouser:
For making different sizes pattern our students are divided in 7 groups. I was in group 2. A pattern size for trouser is indicated by its waist size. Group 2 was given waist size 74 cm. Now for making a pattern of trouser other measurements are given below:
Parameter .................Measurement
- Waist .................................74 cm
- Seat .................................. 94 cm
- Body Rise ..........................27.2 cm
- Inside leg ...........................79 cm
- Bottom width .....................24 cm
- Waistband depth ................4 cm
Now the parameters are discussed below:
- Waist: It is the joint place of the upper body and lower body of human.
- Seat: There is a point at the bottom centre of a trouser that is called cross point. Now the seat is about 6-7 cm above this cross point.
- Body Rise: Body Rise is the sum of front rise and back rise.
- Inside leg: The measure along the sewn from the cross point to the bottom.
- Bottom width: The diameter of the bottom of a trouser.
- Waistband depth: it is the depth of waistband where the belt is we wear the belt.
Different parts of a trouser:
A trouser has the following 6 parts:
- Two sides of leg: Top side and bottom side (both has left and right part).
- Waistband: Two pieces for left and right. Left piece is bigger because of having hooks.
- Belt loops: According to the wish of pattern maker there may 5, 6 or 7 loops.
- Fly piece: Two pieces for left and right.
- Pocket back: There are total 4 pieces with 2 pieces for each left and right side.
- Pocket facing: Two pieces for left and right side.
Apparatus:
- Board paper – 2 pieces
- Pencil 2B - 2 pieces
- Eraser - 1 piece
- Meter scale - 1 piece
- Set square - 1 piece
- Calculator
- Scissor - 1 piece
Working Procedure:
For the advantage of working the procedure is divided in 4 parts:
- Top side
- Under side
- Pocket bag
- Pocket facing
- Fly piece
- Waistband.
1. Top side
At first take a board paper and spread it on a flat table. Mark a point at the left top corner of board paper keeping space from top about 1 cm and from left 21 cm. Give this point number 0.
Now from 0 draw 3 lines at right angles to each other to the bottom, right and left sides. Then;
0-1 Body rise 27.2 cm + 1 cm. Spread the line both right and left side at right angle.
1-2 Inside leg 79 cm. Spread the line both right and left side at right angle to 1-2 line.
2-3 ½ of (1-2) + 5 cm. Spread the line both right and left side at right angle to1-2 line.
1-4 ¼ of body rise. Spread the line both right and left side at right angle to 0-1 line.
1-5 1/12 of seat + 1.5 cm. Draw a normal from 5 on 1-5 line that indicate 6 & 7 points.
6-8 ¼ of seat + 2 cm.
5-9 1/16 of seat + 0.5 cm.
7-10 1 cm. Draw front curve adding 9, 6 & 10 points.
10-11 ¼ of waistband + 2.5 cm.
2-12 ½ of bottom width.
2-13 ½ of bottom width.
Then joint 12-14 & 13-15 with straight lines. During making curve 11-8 expanding 0.5 cm at outside and 8-14 compressing 0.5 cm at inside lines are drawn. During making curve 9-15 compressing 1 cm at inside lines are drawn.
2. Under side
Now on the same board paper this pattern is drawn. But the paper is rotated at 180º angles that the previous topside now becomes the bottom side and the bottom side into topside. Mark a point at the left top corner of board paper keeping space from top about 1 cm and from left 21 cm. Like the previous topside pattern 1-16 is drawn and then;
5-16 ¼ of 1-5. Draw a normal from 16 on 1-16 line that indicates 17 & 18 points.
19 Mid-point of 16-18.
18-20 2 cm.
20-21 1 cm.
9-22 ½ of 5-9 + 0.5 cm.
22-23 0.5 cm.
Then draw beck fork adding 23, 19 & 21 points.
21-24 ¼ of waist + 4.5 cm.
25 Mid-point of waist (21-24). Draw a 12 cm length line from 25 point at the bottom at right angle to 21-24 line and make 2.5 cm width dart.
17-26 ¼ of seat + 3 cm.
12-27 2 cm.
13-28 2 cm.
14-29 2 cm.
15-30 2 cm.
Then draw side seam adding 24, 26, 29 & 27 points and draw inside leg adding 23, 30 & 28 points. Mark a point D at 12 cm distant from point 25. This is the mid-point of face for making back pocket. At mid distant of 12 cm indicate the width of pocket 14 cm. Now adding 5 cm hem allowance the topside and under side patterns are cut.
3. Pocket bag
On the topside pattern mark a point A at the point 28. Then;
A-B 5 cm.
B-C 19 cm.
B-F 17 cm.
F-E 32 cm.
E-D 17 cm.
Adding A, B, C, D, E & F points the pocket bag is drawn. Now the 2nd board paper is taken and this pocket bag is copied on this.
4. Pocket facing
A point B is marked at suitable place under or side of the pocket bag. Then;
B-C 19 cm + 2 cm.
C-D 6 cm.
5. Fly piece
Mark a point A under the pocket facing. Then;
A-B 24 cm.
A-C 5 cm.
6. Waistband
A point G is marked under the fly piece keeping available space. The waistband has two parts: Left part and right part.
Left part
G-H 4cm
G-I ½ of waist
I-J 4 cm
H-K 0.5 cm
Add G, I, J, H & K.
I-L 4 cm (fly piece extension)
Draw a normal on the expanded of HJ line.
Right part
The same drawing from G-K is drawn. Then;
I-M 9 cm (button stand extension)
Draw a normal on the expanded of HJ line.
Now after adding necessary allowance to the pattern pieces these are cut.
Precautions:
- The table should be flat and smooth.
- The pencil used should be soft and sharp.
- The eraser should be clean.
- During drawing the line should be drawn at a time.
- No over drawing is allowable.
- Measurement should be taken carefully.
- To draw normal set square should be used.
- The scissor should be sharp.
- When cutting the seam should be cut at a time otherwise rough edge is produced.
Conclusion:
Skillness, technical knowledge, analytical power of drawing and special ability on technology of making garments are necessary for pattern making. Special care is very essential here because if any fault is occurred during making pattern such as design or measure or lack of any piece and if these faults are not corrected before marker making then the whole production is cancelled. So we should have clear idea and sufficient knowledge on pattern making and should be very careful during pattern making.
Garments Pattern Making Methods
Garments Pattern Making Methods
Pattern Making
Pattern making is a highly skilled technique which calls for technical ability, and a sensitivity to interpret a design with a practical understanding of garment construction. For successful dress designing pattern making forms the fundamental step. This function connects design to production by producing paper templates for all components such as cloth, hemming, fusible etc. which have to be cut for completing a specific garment.
Pattern making is an art. It is the art of manipulating and shaping a flat piece of fabric to conform to one or more curves of the human figure. Pattern making is a bridge function between design and production. A sketch can be turned into a garment via a pattern which interprets the design in the form of the garment components. A pattern is flat while the body is not. The body has height, width and depth. Within this roughly cylindrical framework there are a series of secondary curves and bulges, which are of concern to the pattern maker. Darts are the basis of all pattern making. They convert the flat piece of cloth into a three dimensional form, which fits the bulges of the body.
A pattern maker typically makes a pattern from a flat sketch with measurements or a two dimensionalfashion illustration. The basic pattern is the very foundation upon which pattern making, fit and design are based. The basic pattern is the starting point for flat pattern designing. It is a simple pattern that fits the body with just enough ease for movement and comfort.
Methods of Pattern Making
Pattern making involves three methods-
- Drafting
- Draping
- Flat paper pattern making
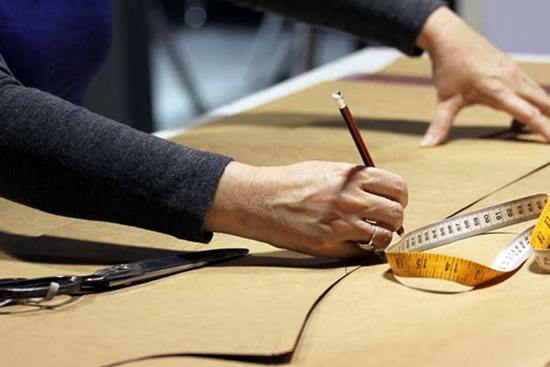
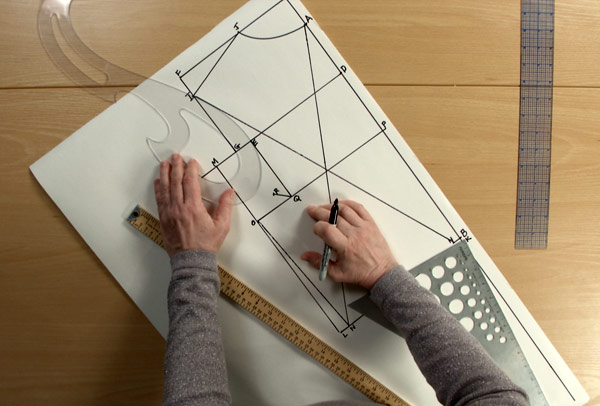
01. Drafting: It involves measurements derived from sizing systems or accurate measurements taken on a person, dress or body form. Measurements for chest, waist, hip and so on, and ease allowances are marked on paper and construction lines are drawn to complete the pattern. Drafting is used to create basic, foundation or design patterns.
MEASUREMENTS
Bust – measure just under the arms around the fullest part of chest.
Waist – measure around narrowest part of torso.
High Hip – measure 6 inches [15.5 cm] below waist around the hips.
Back-waist length – measure from nape of neck to waist level
Shoulder length – measure shoulder from ball socket to side of neck.
Armhole depth – measure from nape of neck to under arm level.
Back width – measure from armhole to armhole across shoulder blades.
Neck – measure around base of neck.
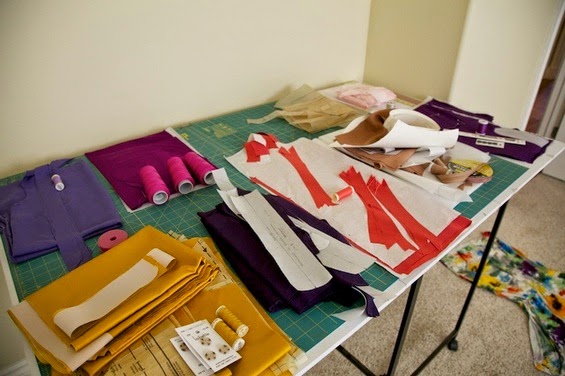
Tools use for Drafting
A: Tape Measure
This is likely something you already have in your stash, because if you have been making clothing you should have been measuring your body along the way! If not, pick up a good quality fiberglass tape measure today so you can start your pattern making off right with correct body measurements.
B: Seam Ripper
Like the tape measure, you probably have a seam ripper. You will use this in patternmaking for taking out your basting stitches when you move from the muslin fitting to the pattern drafting stage.
C: Fine Point Sharpie Marker
Muslin versions are always ugly because they are marked up, but you want to make your markings with a permanent and fine point. I like these push-button fine point sharpie pens as the cap always seems to get lost in my studio! These are quick and easy to use.
D: Tracing Wheel
To take your markings from the muslin stage to the patternmaking stage, this tool will pierce through the paper and leave behind marks to draft with a mechanical pencil.
E: Rotary Cutter
I like using my rotary cutter for the big broad strokes of cutting muslin. Make sure to use a cutting mat beneath your item to protect the cutting surface of the table underneath!
F: Fabric Scissors
Sharp, high-quality scissors are used for all your fabric cutting in sewing and patternmaking. These will shape the muslin down to the proper size after you have cut it big and broad with the rotary cutter.
G: Tracing Paper
I personally do not use this, but many designers like it for leaving marks behind on their muslins. I like a sharpie or tracing wheel, but try these sheets out and perhaps you will love them! Many people do.
H: Scotch Tape
It is inevitable that you will need to tape pattern pieces together and I find that basic Scotch tape is the best for this.
I: Clear Rulers
Having a variety of clear rulers in different shapes and sizes is essential in your kit for patternmaking. I like having a little one for marking in tiny areas, long ones for making marks for pin tucks, side seam lines, and other parts of the patternmaking process that call for something longer than average. I also have a quilting square with diagonal lines for helping square up corners and creating angles.
J: Right Angle
This is also a huge help in creating perfect 90 degree angles on your pattern. These are also available in clear plastic, which most people prefer. I have had this black one since art school and still use it.
K: Curved Rulers
To shape arm holes, hip curves, hems and other lines that are not straight in patternmaking, it is essential that you have a few different curved rulers to get the proper slope in your pattern.

|
| Tools use for Drafting |
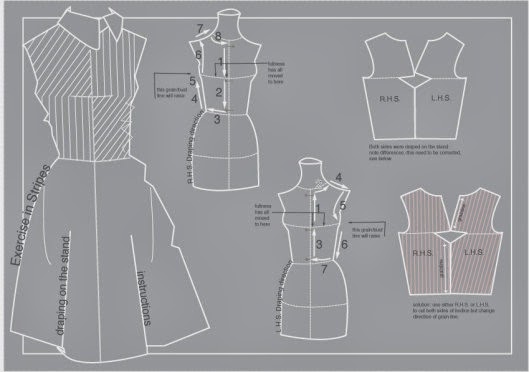
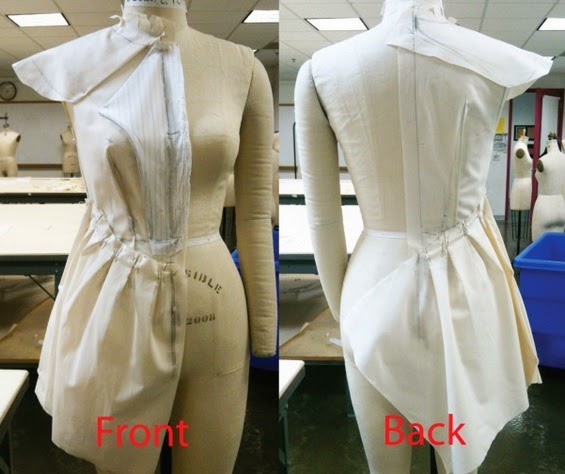
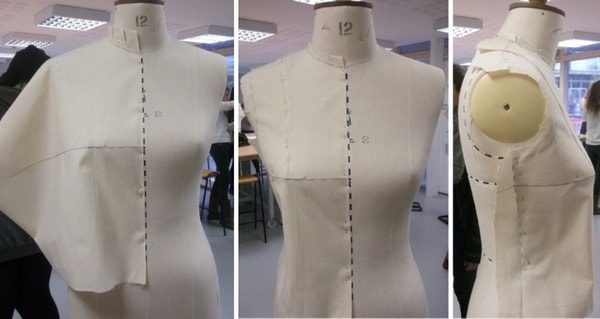
02. Draping: It involves the draping of a two dimensional piece of fabric around a form, conforming to its shape, creating a three-dimensional fabric pattern. Ease allowances for movement are added to make the garment comfortable to wear. Advantage of draping is that the designer can see the overall design effect of the finished garment on the body form before the garment piece is cut and sewn. However, it is more expensive and time consuming than flat pattern making. Draping can be made on a Human body or on a stand.
|
| Fig: Draping |
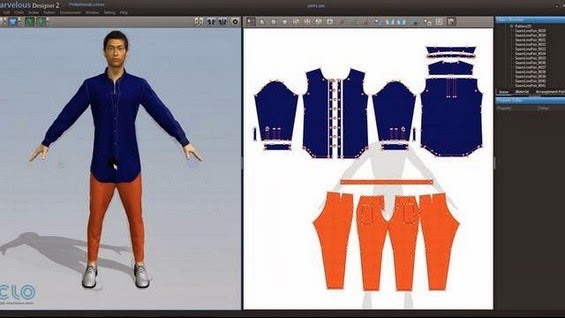
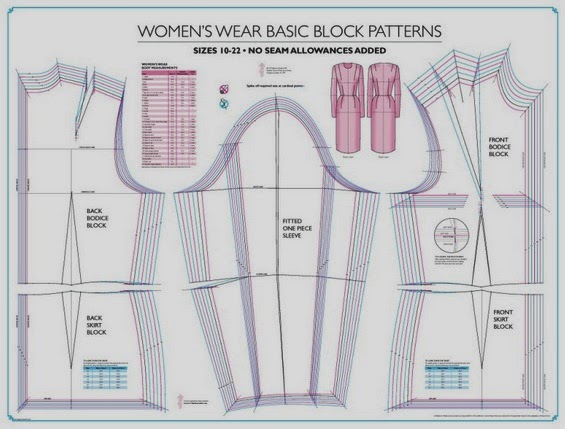
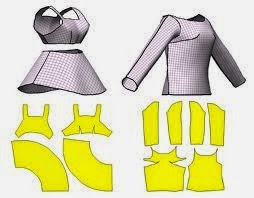
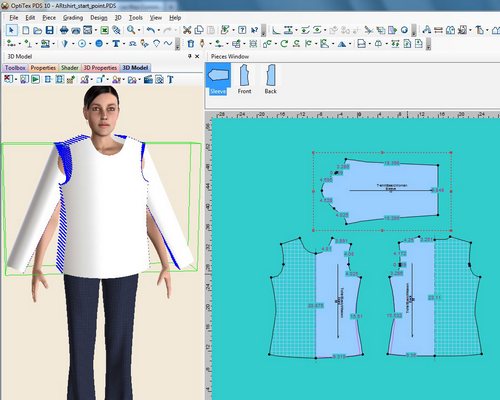
03. Flat Pattern Making: It involves the development of a fitted basic pattern with comfort ease to fit a person or body form. A sloper is the starting point for flat pattern designing. It is a simple pattern that fits the body with just enough ease for movement and comfort. Five basic pattern pieces are used for women’s clothing. They include a snug-fitting bodice front and bodice back with darts and a basic neckline, a sleeve and a fitted skirt front and back with darts. However, as fashion changes frequently women’s styles fluctuate frequently. These basic slopers are then manipulated to create fashions. Nowadays draping is also tested by Computer aid techniques. A basic sloper has no seam allowances, which facilitates its manipulations to various styles. It has no design interest, only construction lines are marked on it. It is necessary that the basic structure of a sloper should be such that adjustments can be introduced easily. For a good pattern making, accurate measurements are of utmost importance.
|
| Pattern making by CAD system |
The flat pattern making method is widely used in the ready-to-wear market because it is fast and accurate(Aldich).
Methods of Garment Pattern Grading
Methods of Garment Pattern Grading
Pattern Grading
Pattern Grading is the process whereby patterns of different sizes are produced from the original master pattern. This process can be performed manually or automatically by a computerized system.Patterns are graded according to size charts which present the sizes and the average measurementsof the population group for which the garments are intended.

|
| Garment Pattern Grading |
Methods of Grading
There are three basic methods of grading: cut and spread, pattern shifting, and computer grading. No one method is technically superior and all are equally capable of producing a correct grade.
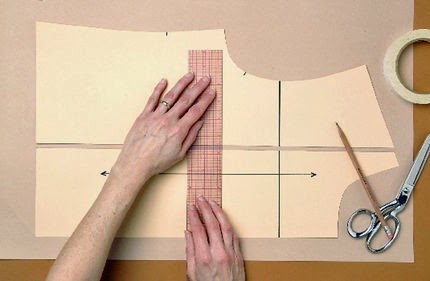
01. Cut-and-spread method: The easiest method, which is the basis of the other two methods, is to cut the pattern and spread the pieces by a specific amount to grade up, or overlap them to grade down.
|
| Cut-and-spread method |
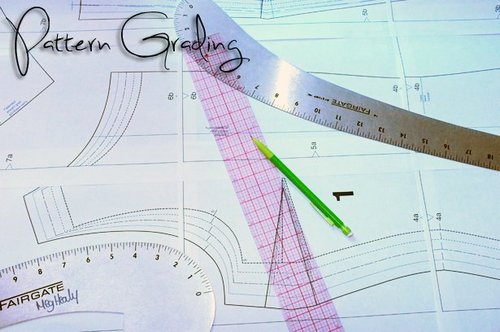
02. Pattern shifting: Pattern shifting is the process of increasing the overall dimensions of a pattern by moving it a measured distance up and down and left and right, (using a specially designed ruler) and redrawing the outline, to produce the same results as the cut-and-spread method.

|
| Pattern shifting |
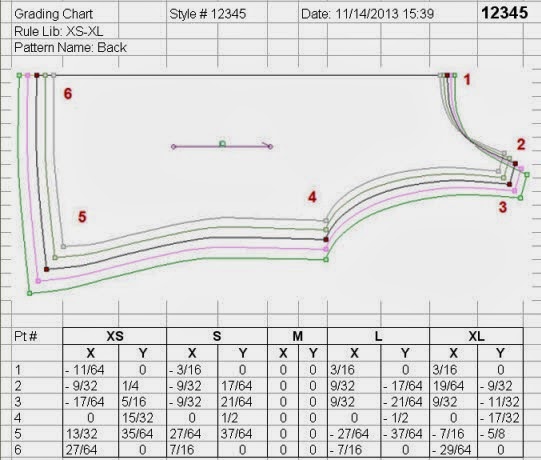
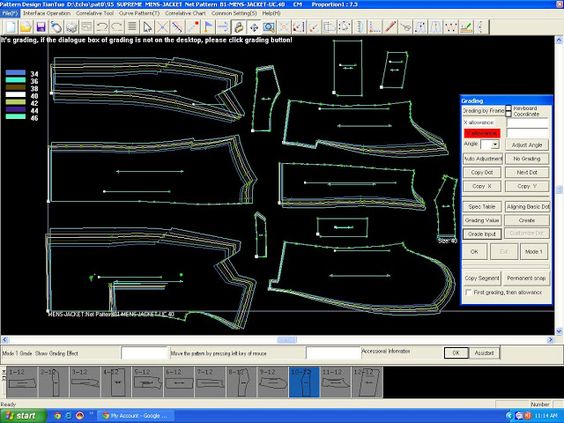
03. Computer grading: This is the fastest method, but tends to be an investment only larger manufacturers can afford. However, sophisticated home computer software is becoming affordable.
|
| Computer grading |
Today most manufacturers grade pattern on CAD systems. The pattern maker guides a cursor around the edges of the sample pattern on a digitized table. At each of the key points, he or she pushes a button to record a grade point. Each point is cross referenced by a grade-rule table stored in the computer, which enlarges or reduces the pattern automatically according to the predetermined direction. If the pattern was originally made by computer, data are already in the computer and can be enlarged or reduced automatically.
|
| Basic block pattern for female |
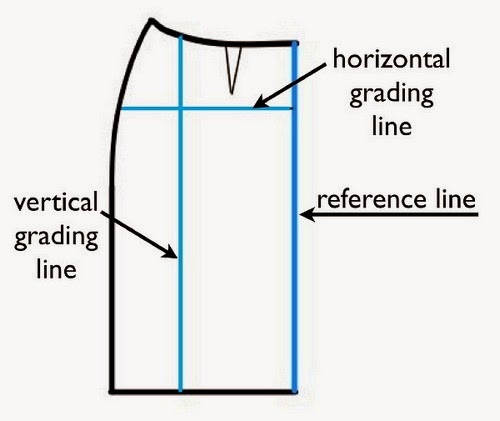
It is necessary to draw the Grade lines from where the grading is done. As from those lines the increasing or the decreasing of measurements will be done.
|
|
Pattern line grading |
Garment Pattern Grading Techniques
Garment Pattern Grading Techniques
Grading:
By following production patterns approved sample is normally made for medium size but if the buyer requires different size then we would have to grade the dimension like S, L, XL, XXL, etc. Grading is an important term in garments manufacturing which means step wise increasing or decreasing the master patterns.
|
| Pattern grading method |
For grading the following two techniques are commonly used:
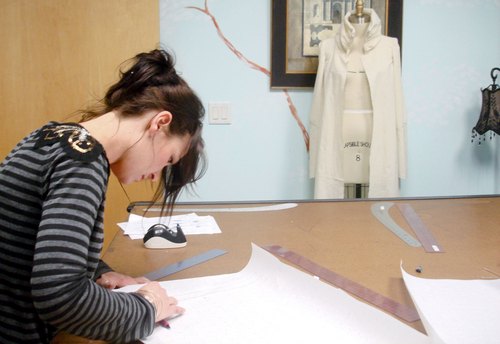
Manual Grading:
The desired range of size is created one by one using pattern templates/master patterns. A first master pattern pieces are sketched on the pattern board and then the points are marked around the pattern pieces as per the direction of grade rules. In this way we can get both the enlarged or reduced size patterns for all sizes of a particular style of garments. A manually operated grading machine can also perform this job. This device grips the master pattern pieces and places on the pattern board as per the predetermined direction after which appropriate edge can be traced out maintaining the grade rule.
Advantages:
- Cost effective process
Disadvantages:
- Time consuming process
- Expected accuracy may not be obtained.
Computer Aided Grading:
At first grade rules are stored in the computer memory and then the computer can automatically develop pattern sets for all sizes using the direction given in the grade chart.
Advantages:
- Quick process i.e. less time consumption;
- High accuracy may be obtained
Disadvantages:
- High initial cost is involved
- Skilled operator is required.
Two types of grading are generally done in industry:
- Half part grading: If the increasing is done in every sides of a pattern, then it called half part grading.
- ¼ th part grading: If the grading acquires increasing or decreasing in any two sides of a pattern, then it is called ¼ th part grading
How to Develop Garment Pattern
Development of Garment Pattern
Patterns
The parts which are equal and same as every parts of a garment made with flat, hard-board paper called patterns. Patterns are made for every different parts of a garment. In other words, patterns are the representative templates of the individual parts of a garment.
|
| Pattern making |
For developing patterns of a garment, some prerequisite matters are considered which are:
- Performances;
- Technical knowledge;
- Power of design analysis;
- Experiences over garments manufacturing technology;
- Will force.
The pattern drafts are developed by calculation and taking account of the following measurements:
- Actual body size measurements;
- Size chart, related to the end use and derived from anthropometric studies. (Anthropometric measurements made of human bodies);
- Grading increments derived from body measurements and size chart;
- Easy allowances.
Patterns used in garments industry are developed passing through the following stages:
1. Block pattern/Basic block/Main block
The patterns which are made in accordance with the area of different part of the human body and their flexes and folds without allowance and style, called block patterns. Block patterns are developed by following two ways:
- Flat method: In this method, different parts of a garment e.g. body and sleeves are by technical drawing. Body measurement and application of method depends on pattern maker.
- Modeling method: It is the primary and first method of pattern making and used in the garment industry widely. Blocks are made with standard body measurement of statue called Toile. Toile is worn on statue and consistent to the body of the statue. Then toile is worn out from the body of the statue and individual parts of the toile are drawn on hard paper. This method requires more time but better result can be gained from it.
2. Working pattern
The patterns which are made with net dimension of a particular style called working patterns. In that case no allowances are considered. It may be said as the second stage of pattern development.
3. Production patterns/Garment patterns
The patterns which are made by adding allowances to the patterns those are made by flat or modeling method i.e. block patterns called production/garment patterns.
Allowances for pattern making:
The following allowances are considered during pattern making:
- Sewing allowances
- Trimming allowances
- Centre front line
- Centre back line
- Button holes
- Button attaching position
- Dart or pleat
- Garments loose / comfort.
Steps of Garments Pattern Making
Pattern Making:
Patterns are paper templates for all the components of a garment, such as cloths, lining, interlining which have to be cut for a garments. These patterns are used to draw sketch on cloth or marker paper.
Steps of pattern making:
Patterns are made in two steps:
- Block pattern.
- Working pattern.
1. Block pattern:
Block pattern or basic block indicates the original pattern. Block Pattern is made based on the specific and standard body measurement without any design or style. It is produced according to exact dimension of body for different age group and gender.
Block pattern making method:
i. Flat method: In this method, different parts of garments, specially major parts are made by technical drawing. In the technical drawing, proportion of different parts of a garment is considered. This pattern can be made by both manual and computerized method.
ii. Modeling: It is primary and first method and widely used in garment industry. Block is made with standard body measurement of mannequin. This block is called toile. Toile is worn on the mannequin and adjusted the pattern necessarily. Then Toile is worn out from the body and individual parts of Toile are drawn on hard paper.
|
| Manual pattern making |
2. Working pattern:
Working pattern is derived from the flat method or modeling. Each and every pattern is laid on the board paper to copy the block pattern. Then sewing allowance, Trimming allowance, Button hole, button attaching, dart, pleat, Notch, shrinkage of the fabric, etc are added with the copied pattern. Working pattern are needed for each an every part of the garments. Working patterns are then cut with a sharp scissor or knife. Garment size and name of the parts are written on the pattern pieces. Sample garments are made from the working pattern.
Grading:
Grading means the step wise increase or decrease of a master pattern piece to create larger or smaller sizes. The starting point can be the smallest size or the middle size. Grading alters the overall size of a design but not its general shape and appearance. Computer aided grading systems utilize internal calculation algorithms (grading rules) for pattern construction.
Two methods of Grading:
- Manual Grading
- Computer aided Grading
Manual Grading:
The desired range of sizes is created one by one using a pattern template. Marks are made around the master pattern at the appropriate distance and the marks are later joined up to form the enlarged pattern. In this way a full set of templates, the pattern set is generated.
A Grading machine eases the task of creating the pattern set. The device grips the master pattern and displaces it by a precise vertical and horizontal distance, after which the appropriate edge can be traced.
Computer aided Grading:
Computer based Grading systems are operating in one of two ways:
A.
- The patterns can be cut out and can be used to make marker manually, if necessary.
- The graded sizes can be stored in the model files of the computer and recalled when cutting markers for that style are to be planned on the system.
B.
- The grading increments are fed in to the computer and the different sizes are generated automatically using the same method as applied for manual Grading.
- The pattern for each individual size is calculated separately starting from the data in the size charts. The resulting layer of the patterns can be displayed to scale on the computer monitor for visual assessment and if necessary adjustment.
Once the pattern set has been generated on the computer, it may be used in various ways, depending on the level of automation in the factory.
In a fully automated system, the garment parts will be sorted automatically and arranged in to a lay plan which can then be transmitted in the form of a control program to the automatic laying and cutting system. Alternatively, the patterns can be sent to a large plotting device where they will be drawn at full scale to serve as paper patterns for manual cutting.
Some important definition related to pattern making:
Darts: The purpose of dart is to eliminate excessive fabric in a pattern so that it can conform into the shape of a human body.
Grain Line: Pattern pieces normally carry a line is called Grain line. Grain Line of pattern pieces usually is parallel to the warp (woven) or wale (knit). The actual direction depends on whether the pattern is to align with the warp, weft, wale or course when laid on the fabric for cutting. The direction of the grain line is therefore determined by the designer.
Drill Holes: Drill holes are small holes drilled into pattern to indicate where other components (such as pockets) should be superimposed.
Notches: Notches are cut into the pattern to indicate points where garment components that are to be joined together
Pattern Grading Methods in Apparel
Pattern grading:
Pattern grading is the process of manual or digital adjustment of your sample pattern from one size to another with the help of size specification chart and without changing the original style, initial look, and shape etc.
Pattern grading means the step wise increase or decrease of a master pattern piece to create larger or smaller sizes. The starting point can be smallest size or the middle size. Pattern grading alters the overall size of a design but not its general shape and appearance. Computer aided pattern grading system utilize internal calculation algorithms (grading rules) for pattern construction.

|
| Fig: Garment pattern grading |
The way of resizing the master pattern is called "grading." In the apparel industry production patterns is generally made for medium size but if the buyer requires different size, then manufacturers have to grade the dimension like S, L, XL, XXL, etc. For example, if the sample pattern size is 10(M), then it must be made larger to accommodate sizes like 12(L), 14(XL) and 16(XXL) and to make smaller for sizes 8(S) and 6(YS).
The objectives of pattern grading is to properly increase or decrease the size of a master pattern, but keep up with shape, fit, balance, style and scale of the apparel. Pattern grading commonly used in apparel industry and fashion design sector.
Types of garment pattern grading techniques:
In the apparel manufacturing basic pattern grading methods are mainly divided into 2 types. They are
- Manual pattern grading or two dimensional grading.
- Computer-aided pattern grading or three dimensional grading.
1. Manual pattern grading:
The desired range of sizes is created, one by one, using a pattern template. Marks are made around the master pattern at the appropriate distances and the marks the later joined up to form the enlarge pattern.

|
| Fig: Manual pattern grading |
In this way a full set of templates, the “pattern set” is generated.
Grading machine:
A grading machine eases the task of creating the pattern set. The device grips the master or basic pattern and displaces it by a precise vertical and horizontal distance, after which the appropriate edge can be traced.
Now-a-days manual pattern grading methods are classified in 2 ways. These are mentioned and shortly describe in below:
a. Cut and Spread
b. Pattern Shifting
a. Cut and Spread:
Cut and Spread grading method are starts by the use of tracing and marking techniques from the original master pattern to a white paper. Ensure that all the marking lines like grain line, darts are visible here. In this method original patterns are cut vertically into 3 parts and spread the cutting pieces by a specific amount to grade up. Then overlap them to grade down. To do this process, only scissors, a pencil, measurement tape, and a ruler is required.
b. Pattern Shifting:
Pattern shifting is another process of pattern grading. When pattern or fashion designer want to increase or decrease the overall dimensions of a pattern to get different sizes is called pattern shifting. To make the pattern larger, transfer the original pattern onto another sheet of paper. To make it smaller, they will have to trim the edges to the desired dimensions. It is done by moving the master pattern a certain measured distance up and down and left and right using a special designed ruler. To get the same result as the cut and spread method designer redraw the outlines.
2. Computer-aided pattern grading:
Computed grading (CAD) is the fastest pattern grading techniques. But when it first came, it was only used by larger fashion or apparel manufacturers for their production process. Now CAD is more affordable software. By this method every manufacturer’s get more accurate, precise, detailed patterns in a short time.
|
| Fig: Computed pattern grading |
Computer based grading systems operate in one of two ways:
- The grading increments are feed into the computer and the different sizes are generated automatically using the same methods as applied for manual grading.
- The pattern for each individual size is calculated separately starting from the data in the size specification charts.
The resulting nest of patterns can be displayed to scale on the computer monitor for visual assessment and if necessary, adjustment.
Once the pattern set has been generated on the computer, it may be used in various ways, depending on the level of automation in the factory.
In a fully automated system, the garment parts will be sorted automatically and arranged into a lay plan which can then be transmitted in the form of a control program to the automatic laying and cutting system. Alternatively, the patterns can be sent to a large plotting device where they will be drawn at full scale to serve as paper patterns for manual cutting. The patterns can also be used in an automatic device for cutting templates from more durable material.
Pattern Engineering | Components of Pattern Engineering
Pattern Engineering:
Pattern engineering is the technique of working with a 2D medium (i.e. paper or fabric) to develop blocks (using either body or garment measurements) which will assist in making garments to drape a 3D body to achieve the desired fit with optimum utilization of resources. A pattern is a map! Can you imagine a bad map that will require you to ask for clarifications on every turn? You may never get to your destination or if you finally do get there, it may be too late. And like landmarks for turns and stops on maps, an engineered pattern should have the correct notches, drill holes for placements of pockets, and engineered seams with proper corners etc. that reflect instructions graders, marker makers, spreaders, cutters and sewers are supposed to follow.
|
| Pattern measurement of human body |
It is extremely important to STANDARDIZE the process and the instructions that go along with it. It's also important to train all the readers and users of this 'map' to read the same information in the map that was put in there by the maker. And standardization along with organization-wide training adds tremendously to the reduction of errors and increase in efficiency. The key components influencingpattern engineering is as follows:
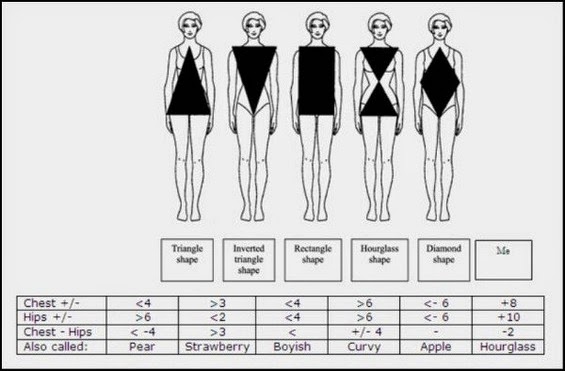
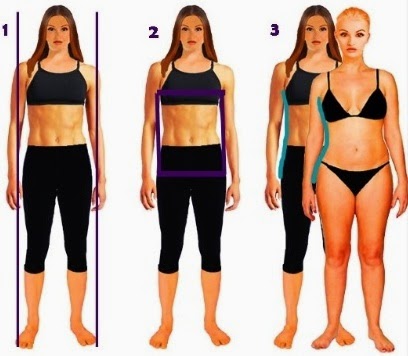
- Body shape vs. garment shape
- Garment fit
- Fabric properties
- Garment assembling techniques
- End use.
Body shape vs. Garment shape
The shaping in human body is primarily in two main areas – the side of the body and the depth of the body. The shape on the side of the body is addressed by shaping the side seam of pattern to bring the garment closer to the body on the side. The depth of the body in front is around bust and waist and in back is around shoulder and small of back. This shaping is more pronounced in case of women body and has to be addressed by folding in the surplus fabric to shape the body contours. This folded fabric is called darts.
|
| Body Shape |
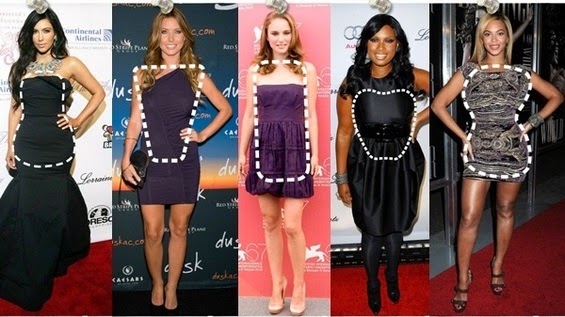
|
| Garment Shape |
Garment Fit
The desired fit of a garment is defined by the function for which it is intended. The required fit can be obtained by developing a suitable basic block generated from body dimensions. Basic block (for garments made from woven fabric) could be loose fitted, semi fitted or fitted. Loose fitting blocks are much bigger than the body girth measurements, the extra spacing between the wearer and the clothing being the ease. Bigger the ease, looser is the garment. Essentially, loose fitting garment block is one where the garment is more than 5” bigger than the body hip and chest girth measurements. It has a boxy shape, i.e. dimensions at chest, waist and hip are equal, and therefore falls away from the body. Such blocks are used in the production of shirts windcheater and rain coat.
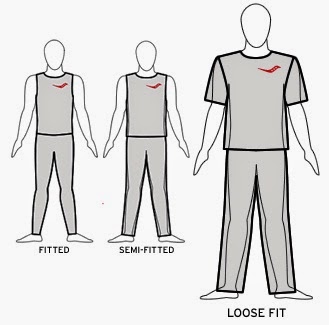
|
| Garment fitting |
Semis fitted blocks are shaped closer to the body on the side. The blocks have chest and hip girth measurement 2- 4” bigger than the body measurement while waist is 6-8” bigger than the actual waist measurement. Fitted blocks are required when garment is to be made fitted around the body and fullness of the garment around the body is required to be reduced such as uniforms, swimsuits or action wear, etc. In such garments, the shape of the body at the front as well as the sides needs to be addressed in the block. The blocks therefore are shaped in the circumference as well as the depth. When using woven fabric in such applications, typically the blocks have chest, waist and hip girth measurement 2-4” bigger than the body measurement.
Fabric Properties
Fabric is a key element in fulfilling the desired function for which the garment is being designed. Each fabric type has its own unique properties and characteristics; inputs regarding these are required to develop the pattern in order to achieve the desired comfort, fit and functionality. Properties of the material selected determine the dimensions of the final block as the behavior and characteristics of the fabrics. For example, while working with knitted fabrics, a key fabric characteristic is the “stretch” which can vary from 18% to 100% or more. Also, the direction of stretch is a critical element here, wherein the fabric may have one way (cross-wise), 2 way (both length and cross-wise) or 4 way stretch (all directions). Functional garments, where such fabrics are used are action wear, exercise wear, sportswear and swimwear.
Garment Assembling
The desired functionality of the garment and the constraints imposed by function and aesthetics, guide and define the selection of openings and closures, trims, seam types and seam finishes for a garment. Such inputs are required at the time of pattern making in order to make provisions for the same.
|
| Garment Assembling |
End Use
Comfort, coverage and protection are the key requirements from any garment. For functional garments, inputs regarding the specific intended end use are required to develop the patterns. In fact, the entire concept of engineering of standard pattern designs revolves around achieving this specific end usage and governs the pattern engineering techniques employed.
|
||||||
| End us
Methods of Pattern Making in Apparel Industryin Pattern
1. Pattern drafting method: Pattern drafting method is mainly depends on accurate measurements taken on a person, dress or dummy. To complete the pattern, measurements are taken for chest, waist, hip and so on, and ease allowances are marked on paper and construction lines are drawn also. This drafting method is used to made basic, foundation or design patterns. Basic pattern set is the example of drafting method.
Pattern draping method is a three-dimensional process of pattern making. In this pattern making method, muslin cloth is used to drape over a Human body or on a mannequin. For making this draping method commonly used muslin, plain weave fabric of unfinished cotton fabric. When a two dimensional (2D) piece of fabric is around on a form of dress or a model, following its shape, creating a three-dimensional (3D) fabric pattern. To get an actual design for finished garment, pattern maker give ease allowances for movement before the garment piece is cut and sewn. This pattern can be marked with pencil lines and the finished muslin pattern can be used repeatedly. But, it is requires more material, more expensive and time consuming than flat paper pattern making method.
Flat paper pattern making method is used to the development of a fitted basic pattern with ease movement and comfort to fit a person or body form. For developing a standard pattern, it is the fastest and most efficient method, so that the basic block is modified to create new and various styles. It is dependent on previously developed patterns. In flat pattern making, the patterns are manipulated by using a slash or pivotal method to create design patterns.
es of patter |
Grading and Pattern Making: Interview Questions and Answers
Grading and Pattern Making: Interview Questions and answers
k.k bala
Associate Professor
Dept of Fashion Design & Arts
Grading and pattern making is very important in apparel manufacturing process. It is very skilful task. Maximum textile and fashion students and professionals became confused how to pattern grading and pattern making. For its complexity this topic is frequently asked in different academic exam interviews and obviously job interviews. For helping purpose students and job seekers I have given some interview questions and their answers. Before going to questions we should know what is grading and pattern making. Which are given below.
|
| Fig: Pattern making |
Grading and pattern making:
Grading is very important task for garment sample maker because they require card sets of your specific patterns and an order of garments to be produced. Grading determines how garments will fit in all sizes.
Pattern grading is the process whereby patterns of different sizes are produced from the original master pattern. In this process, turning base size or sample size patterns into additional sizes using a size specification sheet.
You can also read: Methods of Garment Pattern Grading
Pattern is one kind of template from which the parts of a garment are traced onto fabric before being cut out and assembled. It is the actual copy of different parts of a garment.
You can also read: Garments Pattern Making Methods
Interview questions and their answers of grading and pattern making:
1. When height increased, the length proportions also be increased in-----------------------
a) X, Y Axis.
b) Vertical decrease
c) Proportionate grading
d) Horizontal grading.
2. Anthropometry, a word coined by ------------------------------------------
a) Armstrong.
b) George Cuvier.
c) P. Kunick.
d) Helen Joseph.
3. In Greek root, man and his measurement is------------------------------
a) Anthropometry.
b) Eight head theory.
c) Anatomy.
d) Proportionate.
4.------------------------ is used as the basis for developing the pattern.
a) Computerized pattern.
b) Commercial pattern.
c) Bespoke pattern.
d) Block pattern.
5. Size interval for a Regular size in U.S.A.
a) 6cm.
b) 4 cm.
c) 8 cm.
d) 12 cm.
6. No seam, hem, inlays are added in this pattern.
a) Block pattern.
b) Graded pattern.
c) Computerized pattern.
d) Commercial pattern.
7. The---------------------------is in effect the grading specification for garment patterns capable of being applied for grading.
a) Sloper.
b) Intervals.
c) Size chart.
d) Grading.
8. Major girth differences between each size is---------------------------- .
a) Computerised grading
b) Vector grading
c) Nested grading
d) Size intervals.
9. ------------------------------ for body and skirt grades.
a) The y axis.
b) The x axis.
c) Size symbol.
d) Sizing.
10. ---------------------------- for a line on or parallel to major girth line i.e. ,bust, waist, are hip.
a ) The y-axis.
b ) The x-axis.
c) Size symbol.
d) Sizing.
11. Waist 96cm, hip-122cm, find the trousers’ side length---------------
a) 102cm.
b) 104cm.
c) 98cm.
d) 106cm.
12.---------------------------- is a combination of measurements and each combination is designated by a symbol.
a) Alphabetical
b) Numerical
c) Special code.
d) Creative symbol
13. --------------------------- Where an interval line is common to all sizes.
a) Grading axis.
b) Y-Axis.
c) Common interval line.
d) x-Axis.
14. -------------------------- Where one edge of the component normally parallel to the x-axis is common to all the sizes.
a) Common external line.
b) Grading Axis.
c) y-axis.
d) Down grade.
15.----------------------- is sometimes called the Master Grade method.
a) Nip spacing.
b) Vector grading.
c) Stack grading.
d) Nip position.
16. The base pattern is used to grade all the sizes,and each component has a common origin for the sizes graded from the same component is called----------------------------------.
a) Vector grading.
b) Nip spacing.
c) Machine grading.
d) Nest or stack grading.
17. Computerised digitiser invented by-------------------------
a) Dr.H.J.Gerber.
b) Armstrong
c) Helen.
d) Clock & Kunz.
18. Computerised pattern grading invented in the year. ------------------
a) 1960.
b) 1969.
c) 1953.
d) 1964.
19. Differential growth of one part of the body to the reminder is---------------------------
a) Cervical.
b) Scye.
c) Gorge.
d) Allometry.
20. Expand the following: -
a) CPU. b) FBP. c) VDU. d) MFC.
Answer: -
a. Central Processing Unit.
b. Flat Bed Plotter.
c. Visual Display Unit.
d. Multi-Function Cursor
Interview Questions of Draping and Fitting
Interview Questions in DRAPING AND FITTING - Useful Question & Answers for Facing the Interviews
R.S. Balakumar
Associate Professor,
Dept of Fashion Design & Arts
If we define draping, it is the process of arrange cloth loosely or casually on or around something. It is the process of positioning and pinning fabric on a dress form to develop the structure of a garment design. A draped garment is made of an entire piece of cloth; pieces are not cut away as in a fitted garment. In this article I have given some questions and answers about fashion draping and dress fitting. I think it will be helpful to face viva board.
|
| Fig: Draping |
Questions and answers about draping and dress fitting:
Questions:
1. The shifting or moving of a pattern from a marked position towards a designated guide line is called--------------------------
a) Dots. b) Pivot. c) Fold. d) Slash.
2.--------------------------- is to take up excess fabric of a specified width and taper it to notching at one or both ends.used to aid in fitting the garment over the body curves.
a) Tuck. b) Pleat. c) Dart. d) Gather..
3. A straight cut (longer than a clip) from the outer edge of the fabric into the style line of the garment is known as----------------------
a) Ease. b) Dart legs.
c) Slash. d) Panels.
4. A straight line drawn perpendicular from another line is known as ------------------.
a) Squared line. b) Curved line.
c)Horizontal line. d)Bias line.
5. ---------------------------- the curved seam that is formed at the point where pant legs meet.
a) Seam. b) Shirring.
c) Crotch seam. d) Pleats.
6. ------------------------------- is the place of the Dress makers dress form that always extends from the princess seam to the armhole and side seams.
a) Pivot . b) Princess panel.
c) Ply. d) Ease.
7. ----------------------------- is a technique to shape the fabric by pulling and realigning it on the grain while pressing with steam.
a) Clip. b) Fold.
c) Crease. d)Block.
8. ----------------------- is a inside curved seam forming an inward arc, as in armholes and neckline.
a) Concave. b) Convex curve.
c) Concave curve. d) Looseness.
9. Any good fitting of a garment must have the considerable amount of--------------------
a) Fitted. b) Ease.
c) Semi fitted. d) Looseness.
10. Comfort, Appearance, and Durability are the 3.important for ------------------------ of the garment.
a) Colour. b) Good fitting.
c) Aesthetic. d) Balance.
Answers:
1. (b) Pivot, 2. (c) Dart, 3. (c) Slash, 4.(a) Squared line, 5. (a) Crotch seam, 6. (b) Princess line, 7. (d) Block, 8. (c) Concave curve.
Give the answers of the below questions:
- Define Basic pattern.
- What is Balance.
- Brief on Style lines.
- Write a note on Dress form.
- What is Ease.
- Write in detail of good fitting of the garment.
- What are the guide lines on muslin..
Answers:
1. Basic pattern, made from specific measurements, that is used as a template for tracing rather than cutting. It may be used to develop other patterns.
2. The matching of grains and adjacent pattern sections. When trueing lines on patterns should correspond with the lines and measurements on the figure.
3. Any seam line other other than the part of the shoulder seams, armhole seams, or side seams.
4. Dress form is used for Draping purpose. Many sizes are available i.e., 8,10,12,14. Sizes are available. i.e., 8,10,12,14 sizes . Men, Women, and Childrens dress forms are salable for fashion industry.
5. Ease, the even distribution of slight fullness when one section of a seam is joined to a slightly shorter section without gathers or tucks.
6. Good Fitting of the garment must have comfort,appearance,and durability and also maintain appropriate ease, garment balance, aesthetic appearance,armhole comfort, necessary ease at collar girth,allowable tolerance on chest line-necessary human body parts are to be free from the movement and fitting to be co-operated-good seams, buttons, button-holes, zippers,Velcro placements are to be placed.
7. Guide lines on muslin: Directional lines and markings,that are indicate the grain,cross grain, centerfront,center back, shoulder blade,bustlevel,apex,hiplevel,and side seam. These lines are drawn on the prepared muslin cloth to facilitate correct draping
Fill in the gaps:
1.______is a pointed metal instrument used for punching holes on pattern dart points.
a) L- square b) Awl c) Trimming –Scissors d) Notches
ANS-1.(b) Awl
2..______soft 2b or 5H pencils used in developing muslin patterns.
a) Felt pen b) marker pen c) pencils d) bull pen
ANS-2. (c) Pencils
3. A narrow , woven tape that is used to delignates style lines on the dress form is called ___________
a) Muslin b) Nylon c) Thread d) Style tape
ANS-.(d) Style tape
4 . Garments made of ________should be draped in less expensive cloth
a) Drill Cotton b)Denim Cotton c)Wool d)Knitted Fabrics
ANS-d) Knitted Fabrics
5..______is used to smooth and aid in blocking muslin cloth
a) Charcoal Iron Box b) Steam Iron Box c) Foam Finisher d) Damp Cloth
ANS-. (b) Steam Iron Box
6. This ____is used to measure the human body parts
a) Tape measure b) Armhole curve c) Ruler d) Yard Stick
ANS-. (a) Tape measure
7.__________is the process of ensuring that the length wise and cross grain threads are at right angles to each other.
a) Cross Grain b)True Bias c) Blocking d) Selvage
ANS- (d) Selvage
8. 45 Degree fold line is called _________
a) True Bias b) Straight of grain c) Filling yarns d) Blocking
ANS-.(a) True Bias
9. Customers are always prefer that -----------------------of garment is required to buy.
a) Looseness b)Semi Fitted c)Fitted d) Good Fitting
ANS-d) Good fitting.
10. The outline of the garment minus the details is known as the _________ shape.
a) Value b) Silhouette c) Line d) Colour
ANS-.(b) Silhouette
-----------------------------------------------------------------------------------------------------------------------------
Questions and answers:
1) What is muslin shell?
1. A Basic sample garment made from muslin fabric as an aid during the styling and fitting processes.
2) Define “Ease Allowance”?
2 Ans. The amount of extra fabric added to the draped pattern to make garments more comfortable and allow for easier movement.
3) Brief on “apex”?
3. The highest point of a bus on a dress form or live model. The apex is a reference point for establishing the cross grain position on the front bodice muslin.
4) Write a note on master pattern?
4. Basic pattern , made from specific measurements that is use as as template for tracing rather than cutting. It may be used to develop other patterns.
5) What is Trueing?
5.The process of blending the markings, dots and cross marks made during the draping process. It establish continuous seams, style lines, darts or dart variations
1(a) Write in detail of Evaluation guidelines of draping?
Ans:
1(a) Body Style: Basic, princess, dart less, sheath, jacket, knit, sculptured etc.
Style lines: princess seams, yoke seams etc.
Neckline Detail : Front or back high neck , low neck ,”v” neck, square neck etc.
Dart or pleats: one, two, multiple etc.
Fullness variations: From shoulder, from waist line, radiating fullness from side seam, from style line or from template design feature.
Garment length: mini, traditional, knee length, mid -calf, or full length.
Garment Openings: Front, back, side, double breasted, or none.
Sleeve types : short, long, cuffed, bell shape, shirt style, bishop style or coat style
Accent Pieces : collars, cuffs, plackets, pockets, waist bands, etc to create the finished look.
(Or)
1 (b) Explain in detail of garment balance?
Ans:
1. (b) The matching of grains and adjacent pattern sections when trueing, lines on patterns should correspond with lines and measurements on the figure. All patterns have a definite relationship with the figure that enables the garment to hang straight up and down (plumb) and be parallel to the floor. The garment will twist, drag, or pull when worn if the pieces are not on the correct grainlines and cross grains.
Organizer
- kamalesh bala
- Kolkata, IN
Self
Self
No updates for this campaign just yet
Followers
Support Campaigns
Create a support campaign in seconds!
Support campaigns allow you to get your own fundraising page dedicated to 'Readymade Manufacturing Garments,Ladies shirt ,T-shirt, salwar kamiz, suit,kutti and gens shirt ,t shirt, pants suits coat'
You'll have your own unique link that you can share, and all funds raised will go directly to 'Readymade Manufacturing Garments,Ladies shirt ,T-shirt, salwar kamiz, suit,kutti and gens shirt ,t shirt, pants suits coat'. It's the ultimate way to show your support!
Create support campaign
I would like to thank you for the language I do not know, but please share this link and can reach out to many people, so that I can help someone please please share this link.